Pull the other one…

Sorry I have not been blogging, but it is the summer holidays and the kids have been hanging out at Dads. We have been eating well:
pizza,
smoked chicken breast,
sweet and sour pork (tarted up of course) ,
and spag boll with bread sticks.

My daughter asked me the other day what my favourite sandwich was when we were eating lunch, and I said a Rueben (and then had to explain what it was). I asked her the same question in return and she said hers was pulled pork on a bun with apple sauce. I was at Costco today and so I bought a shoulder of pork to make her a pulled pork sandwich.
Pork Shoulder

I removed the bag and the corset and washed the pork in the sink and patted it dry with paper towels. I cleaned it up a bit removing any fat I could find. I then rubbed sea salt and cracked pepper into it. In another bowl I mixed a tablespoon each of cumin, smoked paprika and coriander and then rubbed that onto the shoulder. Into a Sous Vide bag and then added a tablespoon each of liquid smoke and mushroom ketchup.
Seasonings

To seal the bag and remove the air I hung the bag over the edge of the counter and put the open end of the bag into the Vacuum Sealer. This is a trick I learned. If you have liquid in the bag it will not get sucked into the vacuum if it is hanging over the edge of the counter, the other trick is to freeze the liquids first.
Pork Shoulder in Sous Vide bag

I cranked up the SousVide Supreme to 135F and sat the pork shoulder in the bath.
Sous Vide

How was it you may ask? Well I have to write again tomorrow as it cooks for 24 hours.

This blog is hosted by Brinkster, great service and support so check it out…
Posted in Recipes | Leave a comment

This one is about butchery so not for the veggies…..

Being from Iowa and American I grew up on hamburger:
– BBQ hamburgers done by my Dad (when he turned them over he would yell 3 minutes)
– Hamburger Helper (when we were saving for a new house – yuck)
– Maidrites (great)
– Sloppy Joes (Maidrites with sauce, even better)

In Dubuque we had a butcher in the back of a small store across the street from a large grocery chain. We always went there after grocery shopping in the chain to buy hamburger, as my Mom always said their hamburger was so good. I never really understood what she meant until I moved to the UK, where the hamburger is called mince. Ya mince, minced: bread, bone, cartilage arse and elbows. This stuff should have a warning on it: “May contain some meat”. It has begun to get better over the last 10 years; at least you can buy lean mince (which is still fatty). By the way lean mince at Waitrose is £7.99 per kilo. So after all that moaning I decided to make my own hamburger/mince.

When Costco has a sale on beef I go and buy a bag of cow.
Beef in a bag

This one cost £25.76 but it was £5 off so in the end it was 3.4 kg which is about £6 per kg. So now you need some time, it took about 1.5 hours to setup, butcher and clean up. Oh and you need a knife.
Knife

And a pair of scissors. I also have two large metal trays that I use because they are easier to clean than the counter top, and a couple of cutting boards dedicated to raw meat. Other than that, make sure you get a free bag when you buy your meat at Costco to put all the extra bits in.

This is the worst part because the cryovac bag is full of blood. So cut a corner off the bag and stick that bit in the drain in the sink. Turn the cold water on softly and then cut another hole in the top of the bag to let the blood drain down the sink. Then use the scissors to open up the bag and rinse the meat with cold water and then pat dry with paper towels. This is the worst bit honest, and it does smell a bit.

Butchery starts with removing the strings around the roast with your scissors. Now you are looking for anything white or shinny. White is fat and needs to be removed to make ultra lean meat. Shinny is usually sinew and unless you are cooking for a long time, has to be removed. The process is find one end and insert you knife under the white/shinny about an inch from the end and then cut towards the end where it will be not shinny/white. Now you have a flap to hold on to. Grab the flap and lift up and insert your knife between the meat and the white/shinny. There are two methods you can employ now. The first is saw which is a forward backward motion using whole knife blade. You will want to tip the knife blade up away from the meat slightly so you are separating the white/shinny away from the meat and not cutting the meat and at the same time lifting the handle using gravity to help the process, this is the one I use most and is favoured if the knife is large. The second is small cuts using only the tip of the knife. But the process of creating the handle and lifting as you cut is the same. You should now have some large sections of beef and some smaller ones as a joint is usually composed of several different muscles, hence the string to make it look like a joint. I take the big sections of beef and make a couple of roasts. The rest I cut into strips for the grinder.

Trimmed Roast

I turned the bag of cow into 2 x 0.5 kg roasts for the Pressure Cooker and 1.5 kg of meat for mince. So I have thrown away about 1 kg of stuff (cannot call it meat) and left 2.5 kg of pure beef, which comes to about £8/kg but my lean roasts and mince are pure beef no fat or sinew.

Enter the Fleischwolf, time to make some mince.
Grinder Box

When I used it for the first time the kids and I were dancing around in the kitchen to Judas Priest song “Grinder” whose chorus is:


Grinder
Looking for meat
Grinder
Wants you to eat

This machine is amazing. It has so much torque that it jumps off of the counter when you turn it on.
Grinder Setup

It ground 1.5 kg of beef strips in less than 5 minutes
Ground Beef

This mince is almost all beef
Ground Beef close up

Now all I have to do is bag it up and freeze it, oh and grab a monster burger for dinner.
Bagged and ready for freezer

This is 6 x 1/2 lb of mince, which I believe would be two nice burgers each so 12 meals. Each of the roasts would feed 4 people so that is another 8 meals. So all in that is 20 meals for £20, simple math is a £1 a serving and this is quality meat!

After all that work it is time for tea, Golden Arches Supper Club eat your heart out, cause you cannot touch this.
Plated

This burger was out of this world and made me go yuuuummmm! I had a grill pan on medium-low heat and cooked it two minutes per side x 4 then I covered it with two slices of cheese and covered the grill pan with a lid for a further two minutes and it was perfect. The sauce on the bun is my own “special sauce” made from
Special Sauce

This blog is hosted by Brinkster, great service and support so check it out…
Posted in Butchery | 2 Comments

WOW! I know why I love Lindt Chocolate….

It is because your tongue does not perceive the chocolate as solid, but instead a liquid. In 1879 Rudolph Lindt invented a conching machine that smashed all the ingredients in his chocolate really small.

“a few microns (millionths of a meter, or 40 millionths of an inch) across, smaller than the human tongue and mouth can discern as individual grains. As far as perception goes, solids that are this fine feel as smooth as liquids”

Today I finished Modernist Cuisine Book 2 Techniques and Equipmentof Modernist Cuisine: The Art and Science of Cooking. I am totally perplexed and am searching laboratory web sites for hardware to use in the kitchen. This is because:

“Unfortunately, blenders (whether upright or handheld) have an intrinsic limitation: they are generally unable to make particles smaller than 10-12 microns / 0.0004 – 0.0005 in, and even that is not easy to achieve. This dimension is just above the range of sizes that the human mouth can detect as a particle.”

What you need to make the smoothest purees or emulsions is a rotor-stator homogenizer which can smash up big time.

This blog is hosted by Brinkster, great service and support so check it out…
Posted in Cook Books | Leave a comment

To me Wimbledon means…

Strawberry season!!!!!! English strawberries are not the gianormous monsters from California, but instead they are small, sweet and juicy. I do not know if I have ever had better strawberries in my life than the ones that are ripe in early July in the UK. So I take advantage of this and buy at least two containers a week during the season.

There is a joke in my house, that “Dad does not DO pudding”. Somehow I cannot see that is a good idea to eat a huge calorific monster after a good meal. The odd bit of confectionary now again mid morning or in the afternoon is agreeable, but having a sweet after every meal to me seems wrong. And anyway I would rather spend my calories on a drink with dinner than a sweet after.

When my daughter came to stay the other day I decided to do pudding and it made her go yuuuummmm big time so she insisted that I make it for my son also.

The day before I took a container of fresh English strawberries and cut them into quarters in a bowel. I then covered them liberally, and I mean liberally, with about 5 tablespoons of sugar.

Strawberries and sugar

OK they do not need the sweetness as they are superb just now. But the sugar extracts a syrup that is just to die for. Cover with a plate and put them into the fridge over night. Next year I may try the freeze, thaw cycle mentioned in the Modernist Cuisine: The Art and Science of Cooking which would extract the juice without adding any artificial sweetener.

I bought some Madeira cake for the base and some fresh whipping cream for the topping. I am not sure if you remember but I bought a Hot & Cold Whipper for Cream, Sauces, Froths and Mousses to make crazy scrambled eggs on toast. Well this device is really supposed to produce whipped cream. Now when my daughter did the cream the first time she did not pull the leaver all the way so it leaked most of the nitrous oxide cartridge out before getting to the cream. So when my son was in charge I said pull the trigger and give each bowl a squirt but make sure you do it with feeling…. Have you ever said something that rings in your ears that you know you’re going to regret after you said it? Then there is that pause where you want to just suck the words back into your mouth and pretend you never said it. Well two days later I am still cleaning whipped cream off of bits of my kitchen. I think I saw the funny side, after looking at my speckled shirt when my son turned around in horror with cream on his face with one of those “but you told me to” kind of looks. Well here it is plated (smashed) up.

Plated Heaven

My son finished his pudding by the time I took this picture of the finished product, and I think from the other room I heard yuuuummm. This is a bit of heaven in a bowl.

I will never ever, ever have UHT cream in a can in my house again as fresh whipped cream made with one of these machines is 1000 times better. Madeira cake is soooo much better than Bisquick short cakes for the base. And I will let you know about a healthier way of extracting the juice from strawberries, but it will be next year as the season has ended.

This blog is hosted by Brinkster, great service and support so check it out…
Posted in Recipes, Uncategorized | Leave a comment

What do you do with…

Left over Best Ever Lamb? Smash it up with mint jelly, mayo and fresh shredded lettuce, that’s what!

OK, first thing is you need to know in advance that you are going to have left over lamb. The reason is that you have to make the mint jelly.

Aside: Since I know this is a multi-national blog please note:

Jelly = Gelatine = Jell-O

Normally, I would buy mint jelly from a store but on my excursions to 4 different stores on the weekend I did not find 1 brand that did not have vinegar as one of the ingredients. Vinegar in jelly is just sick! Vinegar is for those losers who like mint sauce, not mint jelly. So on the weekend I made my own mint jelly and it is really nice.

First you need some fresh mint
Mint

And some lemon jelly
Jelly

And that is it. You need to smash up the mint so my device of choice is a food processor
Chopped Mint

Make up the jelly with boiling water and then add the mint and stir. Then put into a sterilized spaghetti sauce bottle cause your too cheap to buy a new jar. Then watch all the mint float to the surface and say, now what! I gave the jar a shake and put into the fridge to set. Then I set an alarm for 20 minutes and went back and shook it again, rinse repeat about 5 times then you have some mint jelly with evenly dispersed mint.

Mint Jelly

Why mint jelly you may ask?
Well the slight sweetness of the jelly makes the final dish quite pleasant. Also the jelly kind of attacks the mint and makes it soft and subtle so it is not an “eating grass” texture. The reason lemon works in the jelly is that it is the citrus and peel used in the marinade of the original dish.

What is the reference to “smashing” all about?
I have mint jelly and I have mayonnaise and they need to be combined. Therefore a fork and some smashing needs to be done to combine them.

Basic ingredients are wet and dry. Kind of like making muffins you combine the wet ingredients and then combine the dry ones. Then you add the dry to the wet. So here is the dry.

Dry Ingredients

Shred the lettuce and cut the lamb into small cubes.
Dry Ingredient Chopped

Now you need to combine the wet ingredients, so about equal parts of mayo to mint jelly and then smash them together with a fork.

Wet Mixed

Combine the dry and wet ingredients.
Mixed

Just to wrap up…
Wrapped

This blog is hosted by Brinkster, great service and support so check it out…
Posted in Recipes | 1 Comment

This one is for Ex-Boss and fantastic UK Lamb…

I convinced Ex-Boss that if he wanted to BBQ with the Big Dogs he needed a Weber Gas BBQ which is the Rolls Royce of machines for cooking al fresco.

Weber Gas BBQ

Then he needed a fool proof recipe to wow his BBQ guests and make them go yuuuummmm at his prowess in the cooking arena. I had just the recipe for him, as it was fool proof (sorry Ex-Boss):

Best Ever Lamb

In the UK, Costco does a boneless leg of lamb in a bag.

Leg of Lamb

I adapted a recipe from one of Rick Steins books, Rick Stein’s Food Heroes to make it a bit easier.

First we need to prepare the meat and marinate it the day before, so open the bag and give it a wash. Then we need to remove the corset.

Leg of Lamb in a corset

Find the holes where they removed the bone and insert your knife to make it a butterfly of lamb.

Where to open the leg of Lamb

If there are any thick sections of meat then give them a cut halfway through to make sure all the lamb is the same thickness so it cooks evenly.

Cut and ready to marinate

Now it is time to make the marinade.

2 tsp of Cheats Garlic
2 tbsp of Sweet Chilli Sauce
Go to the garden and grab herbs (rosemary, thyme, chives, marjoram, parsley etc.) until you have 3 tbsp after being chopped finely.
1 bay leaf cut into shreds with a scissors
3 strips of lemon zest (not the white bit under the skin)
Juice of ½ a lemon
1 teaspoon of Smoked Malden Sea salt
1 teaspoon of cracked pepper corns
6 tbsp of olive oil

Marinade Ingredients

Then give it all a good stir with a fork.

Marinade Stirred

Place the lamb into the marinade and use your hands to rub the marinade into the lamb. Turn the lamb over and scoop the marinade up from the pan and continue to press into the meat. Cover with cling film and into the fridge for an over night to bathe in the spicy loveliness.

If you have a chance the next day before cooking, give the meat a turn and good rub. I am sure there is a joke here but I will pass as it is before 9:00.

About 2 hours before you are ready to eat, take the lamb out of the fridge to get to room temperature. An hour before you are ready to eat put the BBQ on to medium heat. Put the lamb onto the grates and then dump the rest of the marinade on the top. Watch out for flair ups but make sure you big it up for your guests as they will be amazed at your cooking skill.

Lamb on BBQ

Cook the lamb at most for 50 minutes, but you can get away with 40-45 if you like it a bit rare. Every ten minutes you need to turn the lamb over and move it to a different area of the BBQ.

1/2 Cooked

Lamb is quite fatty and prone to ignition and fire, charcoal not food if you leave it one spot for too long. A little colour is one thing, but this recipe can go up in flames. I remember the first time I cooked this, looking out the window saying to myself, that is a lot of smoke…. oh no fire!!!!
Lamb Done

Oh wow was this good and made me and the kids go yuuuummmm, but there are leftovers and they are almost as good, and I will post that soon….

This blog is hosted by Brinkster, great service and support so check it out…
Posted in Recipes | 1 Comment

Tuna is not the only food that comes in brine…

Brine is used as preparation method for BBQ chicken. From Volume 3 of Modernist Cuisine: The Art and Science of Cooking

“The goal of brining is to apply enough salt to meat or seafood that the food retains more juices during cooking and that the flavor is enhanced without curing the flesh in the process. Thus, the challenge of brining is to disperse dissolved salt evenly throughout a piece of food, while preventing the salinity from becoming too high.”

Jamie Purviance, author of Weber’s Time to Grill: Easy or Adventurous, It’s Your Call (review) sent out one of his recipes in his weekly email which was Rosemary-Brined Rotisserie Chicken. I decided to try this yesterday since the weather was so nice in England, and I like chicken. So I popped into the local Sainsbury’s and bought a Taste the Difference Woodland Trust Free Range chicken. If you are going to spend lots of time making something nice then start with great ingredients.

OK I have the chicken. I have the brine ingredients but the recipe says the chicken goes into the brine mixture and then into your refrigerator. My guess is that Jamie has an American fridge the size of my entire kitchen; he does not have an issue. Hmmm I have two problems. I don’t have a pot big enough for the chicken and the brine and if I did it would not fit into my fridge unless I took all the shelves out and food. But I do have a beer cooler that fits a 12 pack and some ice so badah bing we are ready to brine that puppy. I mixed the brine in the cooler, but changed the recipe a bit to include ½ smoked sea salt and ½ regular.

Brine

I thought I should taste the brine to see what it was like – BIG BIG mistake, yuck.

And placed the chicken into the brine

Chick in Brine

I put about ¼ bag of ice into the brine and on with the lid for 6 hours.

Just Chillin

After the brine was completed I removed the chicken and patted down with paper towels. Do not wash the chicken because you will rinse the brine out of the skin and meat, which you just spent 6 hours infusing. I then followed Weber’s Time to Grill: Easy or Adventurous, It’s Your Call in the section “Prep School” that shows how to truss a chicken for the rotisserie. If you do not truss the chicken then two things happen. The legs and arms hang off of the chicken and as they get cooked they fall even further away from the body. They then get too close to the heat and burn before the body is cooked. Also since they hang off of the body they cause the rotation to be slow then fast as they are raised and lowered which also causes uneven cooking.

Jamie Purviance says to cook the chicken on the rotisserie in the BBQ with the lid closed over medium heat. The Modernist Cuisine says that is not roasting but instead baking. Spit-roasting also called rotisserie of a chicken is an essential feature of the cooking. The food goes from hot when the food faces the fire or heat, and slowly rotates away from the heat into the cool which is the secret to a great roast.

“These two competing processes balance out such that the average heat below the surface of the roast is only a fraction of the peak heat at the surface. If everything is judged just right, the interior of a roast ends up, over a dizzying number of rotations, gently cooked to a shallow gradient of doneness from just below the surface all the way to the center, while the surface itself gets cooked to a crisp, deep-brown finish.”

I have been wanting to try open lid cooking since I read that section, so here is the start of the process at 5:30 ( I wanted to eat at 7:00).

Cooking Chicken

I just put the front burner on medium to get the hot cold thing going. After about 45 minutes it was supposed to be half done, not even close. I cut the stick in half. After another 45 minutes it was supposed to be done, nope. I cut another 2 inches off the stick and turned on the back burner too. Now I was really hungry and it still was about an hour away. Cranked up both burners to high and started to get sound of fat hitting the flavour bars, now we are cooking with gas. Another hour and it was finally done.

Cooked Chicken

Waiting the 15 minutes for it to rest was agony, the smell was great and it looked so good. I took a pair of scissors and cut in half.

Plated Cooked Chicken

I grabbed some paper towels and sat down and trough’d the lot. It was great and so juicy I had to stop half way through and re-towel. Nothing left but bones, this made me go yuuuummmm!

Lessons learned:
– When the chicken comes out of the brine it is very cold, allow an hour to come to room temperature, before BBQ.

– The height that the BBQ lid should be open is about 8 inches not two feet.

– Preheat the BBQ with both burners on high and then leave it that way.

– Try putting some smoked paprika on the skin before roasting.

This blog is hosted by Brinkster, great service and support so check it out…
Posted in Recipes | Leave a comment

Wow this is gaining momentum…

There is a subculture emerging between the sciences and cooking. Last year it took over Harvard University, and they have a proper course in Modernist Cuisine. Some of the public lectures they had in the 2010 course are available online.

Science and Cooking
This public lecture series discusses concepts from the physical sciences that underpin both everyday cooking and haute cuisine. Each lecture features a world-class chef who visited and presented their remarkable culinary designs: Ferran Adria presented spherification; Jose Andres discussed both the basic components of food and gelation; Joan Roca demonstrated sous vide; Enric Rovira showed his chocolate delicacies; Wylie Dufresne presented inventions with transglutaminase. The lectures then use these culinary creations as inspiration to delve into understanding how and why cooking techniques and recipes work, focusing on the physical transformations of foods and material properties.

This blog is hosted by Brinkster, great service and support so check it out…
Posted in Uncategorized | Leave a comment

Deep Fried Pizza…

Or if you are Italian “Panzerotti”. When I was a child in Dubuque, Iowa there was an Italian Restaurant, which served the most fantastic dish called Panzerotti. I had the makings for pizza for when the kids came over, but it was getting a little tired so I decided to tart it up!

I had been reading Modernist Cuisine: The Art and Science of Cooking, and they had a whole section on cooking in oil:

i) It is good to have a cool zone under the heating element of about an inch so that anything that falls into the oil sinks to the bottom and does not get cooked again, hence less carcinogens or food that is burnt over and over degrading the oil.

ii) There is a lifetime to oil after which it loses its ability to reach the intense heat. This is due to chemical reactions in the heating process and the addition of burnt food particles. When this happens the oil needs to be changed.

iii) You should cook the food as high a temperature as it will stand which causes bubbles of air around the food and keeps the oil away for up to 40% of the cooking time.
“Cooking French fries in oil just 10C/18F below the recommended temperature of 185C/365F can increase the oil absorption by 40%.”

iv) The grease only soaks back into the food after the heat is removed so dab with a paper towel after removing from the oil, or put on a paper towel lined rack.

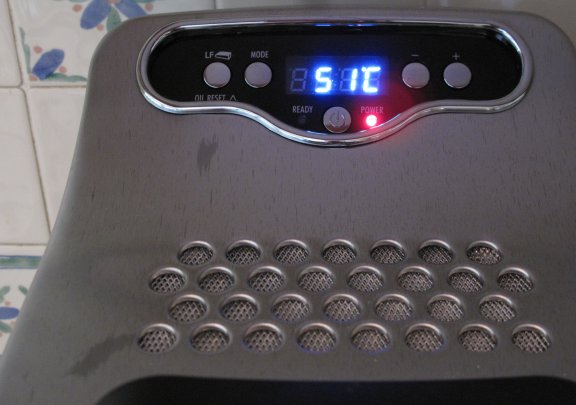
I have not had a deep fryer for about 15 years. The last one I dropped, full of oil, on the carpet which was ruined. Technology has come a long way since my last deep fryer. On Saturday I bought De’Longhi Coolzone Fryer and two bottles of oil from Costco.

It has a cool zone under the heating element – check.
It has a timer for the oil that keeps track of how long it is been heated and warns you so you can change it – check.
It has a spigot on the front for easy oil change -check.
It comes apart completely for easy cleaning -check.
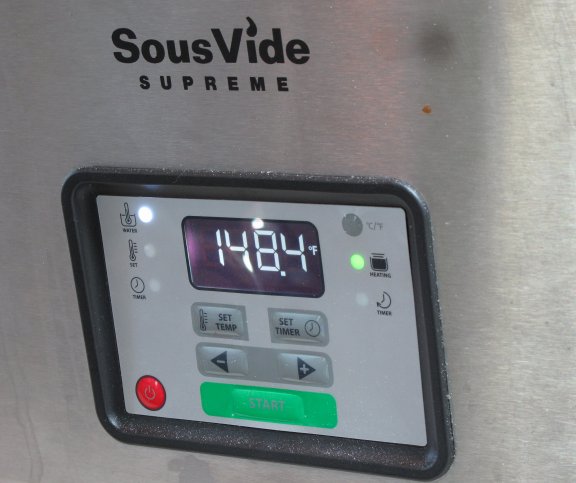
It has a digital temperature gauge for consistent control and goes up to 190C so you can cook hot and not greasy – check.

Oh and the killer, BLUE LED’s!!!!

I digress into food toys and books, this is about Panzerotti after all.
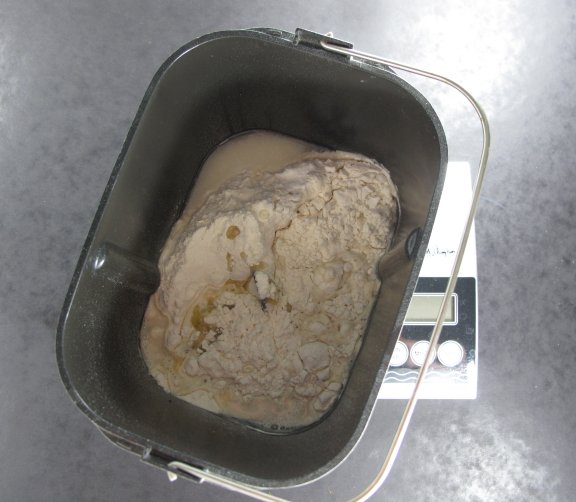
So I put:
½ tsp yeast
300g Strong White Flour
1 tbsp Olive Oil
1 tsp salt
170 ml water

Into my Panasonic Breadmaker and set the selection to pizza dough.

Dough Ingredients

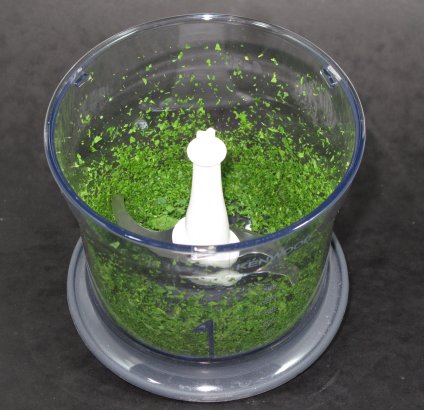
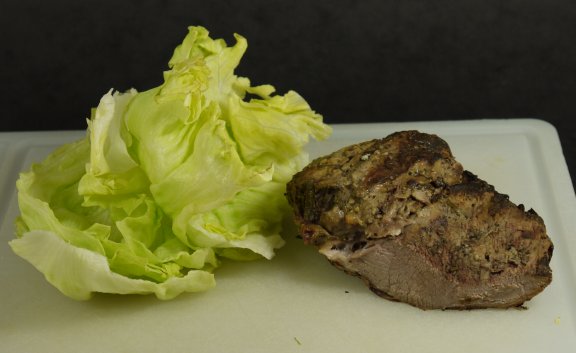
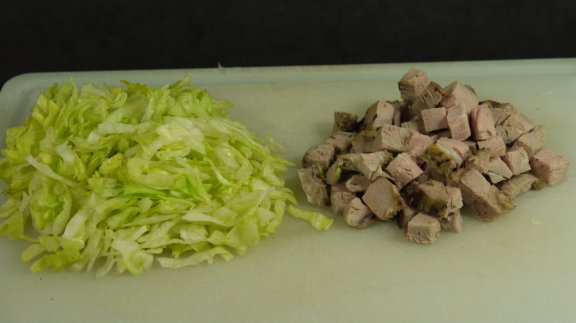
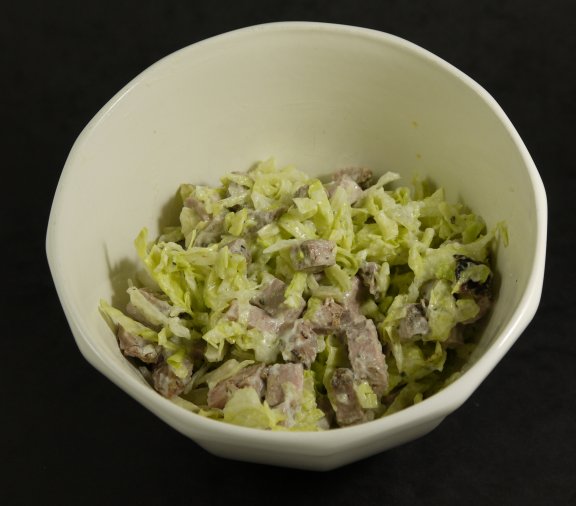
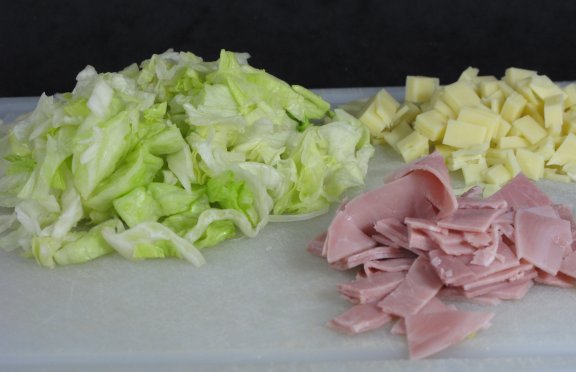
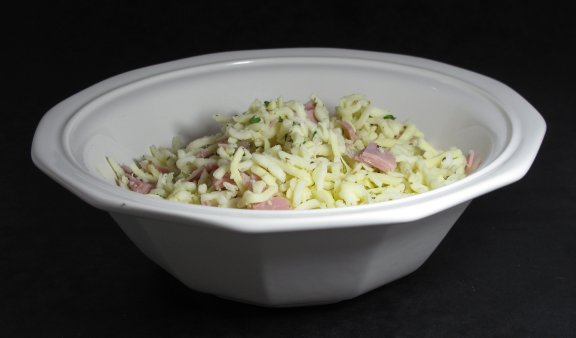
Meanwhile it is time to create the filling. Diced cooked ham is mixed with grated mozzarella cheese. But here is a little twist to making pizza. I went out to the herb garden and grabbed pretty much anything that was growing:

Sage
Rosemary
Parsley
Oregano
Marjoram

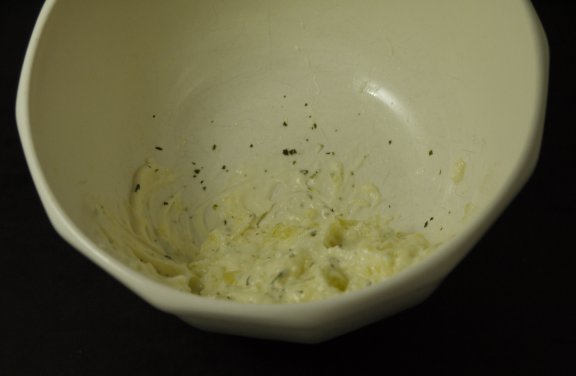
I chopped up about 3 tablespoons of fresh herbs to mix with 500g of grated mozzarella cheese and then added a tsp of celery salt. Mix it with your hands.

Filling

After 45 minutes the dough is done

Dough Ball

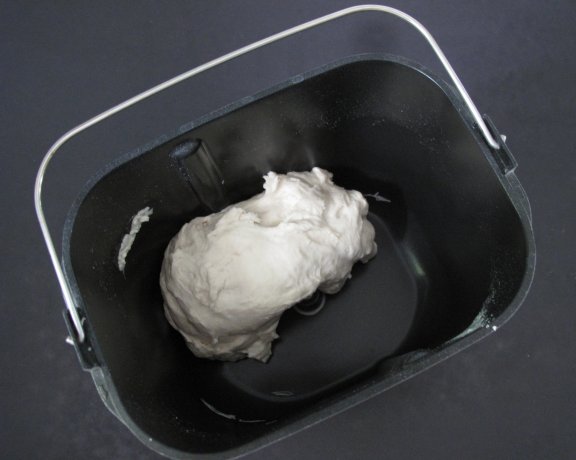
and ready to put into a olive oiled bowl, covered and put in a warm place.

Dough Ready to be Raised

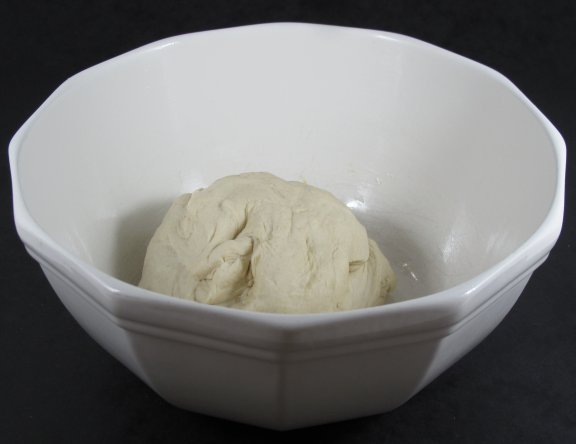
Wait about an hour and the dough would have doubled in size.

Dough Raised

Punch the dough down (bad dough) and divide into the amount of pies you want, around here that is 3.

Dough Divided Ready to Roll

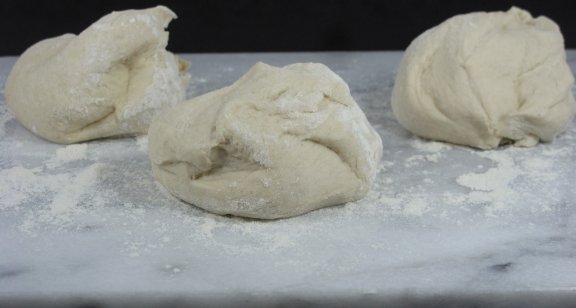
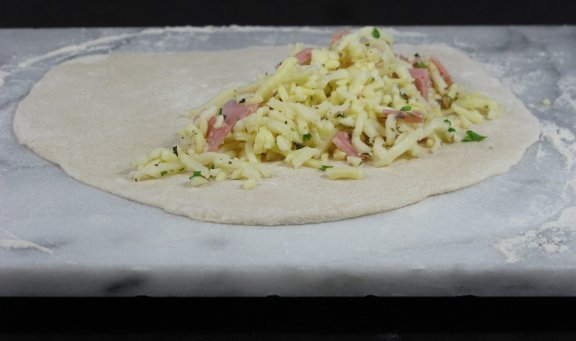
Roll the dough out to a reasonable circle, but make sure that it is not too thin or that there are any holes. Blow outs in the fryer is a drag big time. Put some filling on half of the pie.

Loaded

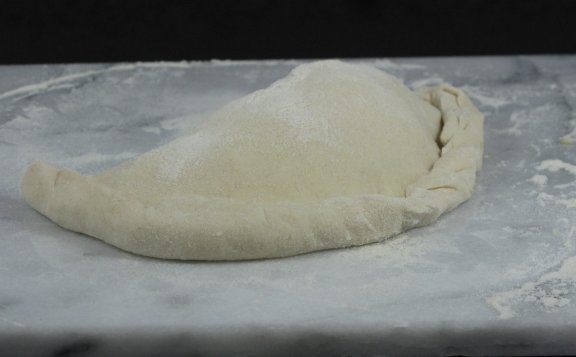
Now fold over the other half and crimp like a Cornish Paste, make sure you have a good seal as like I said a blow out in the fryer is not something you want.

Crimped

Set aside and get your fryer up to 180C. Also get a jar of Dolimo spaghetti sauce and dump it into a pan, cover and turn the heat down to low.

Heat It Up

When the fryer is up to heat lift one of the pies and put it in the basket and lower into the bubbling oil. Set your timer for 2 minutes and after it fires turn it over.

Cook It

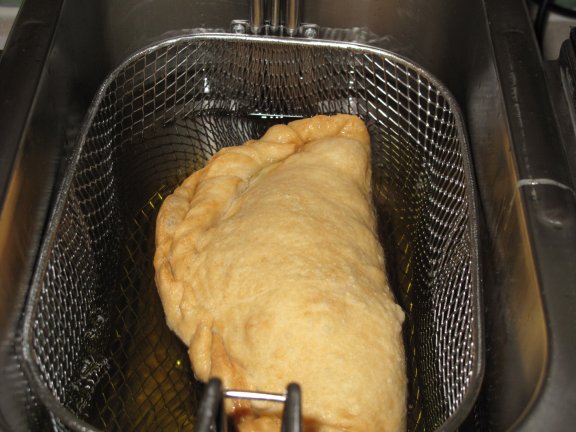
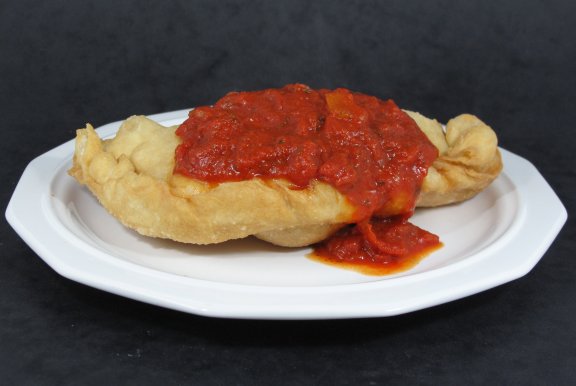
After it is cooked transfer to two pieces of paper towel and fold one over on the top and pat dry. Now wait for at least 5 minutes. I am not sure what happens here but the dough goes from being hard to soft and lovely. Ladle a couple of spoons full of spag sauce over the top and you are ready for a huge yuuuummmm.

Plated

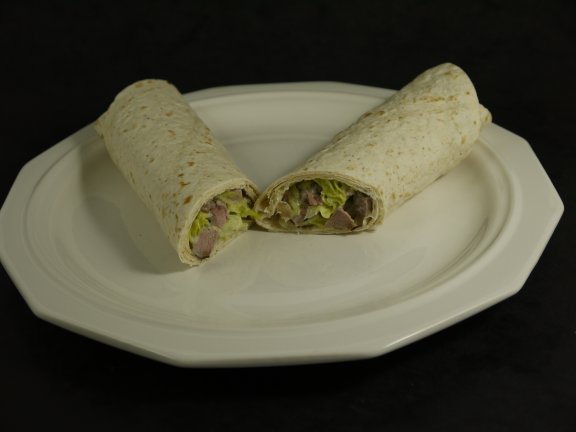
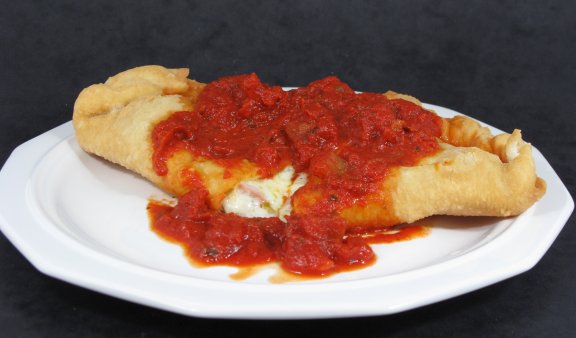
Here is what it looks like cut open.

Cut Open

This blog is hosted by Brinkster, great service and support so check it out…
Posted in Recipes, Tart it Up | 1 Comment

A “little” bit healthy tonight…

After eating deep fried pizza yesterday (post tomorrow), I decided a salad would be a good idea for tea tonight. My favourite salad is a Chef Salad with cheese, ham and eggs, oh ok, maybe not that healthy after you cover it with Salad Cream.

I decided to “try” and cook the eggs

Eggs

Sous Vide.

When I was waiting for my Modernist Cuisine: The Art and Science of Cooking books I purchase a Sous Vide, but did not know how to really use it. So I downloaded an online recipe book Beginning Sous Vide which is really very good. I have done a crazy Scrambled Egg Recipe but tonight we I wanted soft boiled. I opened the Beginning Sous Vide and it said the “perfect” egg was 148F for 60 minutes. So I fired up the Sous Vide and set the temperature to 148F

Perfect Egg Temperature

I did not have to vac pack the eggs as they are already done. So I gingerly put them in the bottom of the Sous Vide and sat back for an hour.

Eggs in a hot tub

I then cut up some lettuce, cheese and ham to go with the eggs (classic Chef Salad).

Other ingredients

OK this is getting quite weird. After an hour I took one of the eggs out of the bath and tapped it with a back of a knife, but it was still wet. Hmmm, back to the Beginning Sous Vide book and came across a recipe that said.

“Take the eggs out of the water bath using a slotted spoon or tongs. One at a time, gently crack the eggs on the counter and remove the top ¼ to ½ of the shell. At that point you should be able to turn the shell upside down and the egg should slide out. Add 1 sous vide egg to the top of each salad. Drizzle some olive oil on each salad, grind some pepper”

Huh “slide out” what is that all about!!! I dumped the egg onto a plate and it was quite wet but it stayed together. So I put some sea salt on it and ate it with a spoon. It was really quite good, but not what I wanted on a salad. So I cranked up the temperature to 151F and let them cook for another 10 minutes. Trial and error when you are hungry is not really a good idea.

Cooked Eggs

This is a bit too weird. The egg whites are like mayonnaise but the yolks are cooked. So the second egg is put on the salad, which has been cooked for 80 minutes at 151F. And here it is plated up and ready to eat.

Classic Chef Salad

I decided to try another couple of degrees so up to 153F for another 10 minutes.

153F Cooked Eggs

And the only thing that was cooked further was the yolk.

153F Cooked Yolks

So there is no way to cook hard boiled eggs in a Sous Vide. The whites always turn out like mayo and the yolks go from liquid to solid. I thought is was nice but not for a salad, but on toast with beans and bacon it would be really good.

This blog is hosted by Brinkster, great service and support so check it out…
Posted in Recipes | Leave a comment