
Making Salata de Boeuf was going to take some major deconstruction….
Wow! has it really been over 6 years since I blogged last… that was after a trip to Portugal for work where I blogged about the meatgasm. Not any trips this year due to Covid 19, but to keep our spirits up at work we are having a cooking competition. Challenge accepted. Since our team is from all over Europe and the Middle East the brief was to select and make one or more of these:
Starter from Romania: Salata de Boeuf
Mains from Egypt: Falafel
Desert from Portugal, Germany, UK, Italy and France: Yule Log
Something that intrigued me was my Romanian colleagues said that Salat de Boeuf had too much mayonnaise, is there such a thing?
Looking at the recipe the beef is boiled for 2 hours – really 2 hours! The only meat that gets that kind of abuse is when making stock where all the meat gets thrown away because it is inedible.
The recommended ingredients:
– beef
– carrots
– peas
– potatoes
– pickles
– mayonnaise
– mustard
I am assuming loads of mayonnaise gives a smooth mouth feel to the salad. So, to keep the mouth feel and reduce the mayo I am going to have to fool your mouth into thinking that all the foods are smooth like mayo, but not over do it because no one wants to sit down to a plate of baby food… not even babies.
So here is the plan
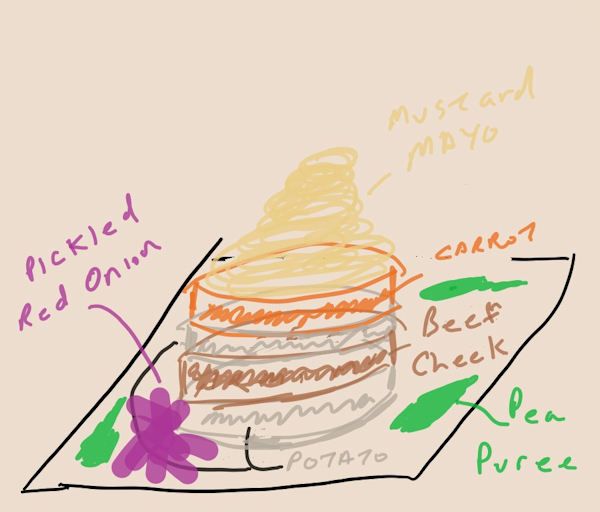
Starting from the bottom there is a disk of potato with whole grain mustard on top. The next layer is the beef in “gravy” then potato again followed by carrot gelatine. Topped off with mustard mayo. On the side there is pea puree and pickled red onions. I think that covers all the ingredients.
The tricky parts of this construction are the beef and the carrot layers. They must be strong enough to stack but not rubbery like a hockey puck because I want a smooth mouth feel for all the ingredients except the potato.
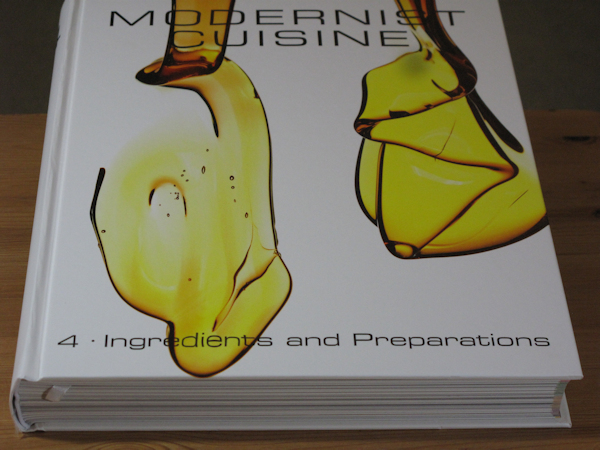
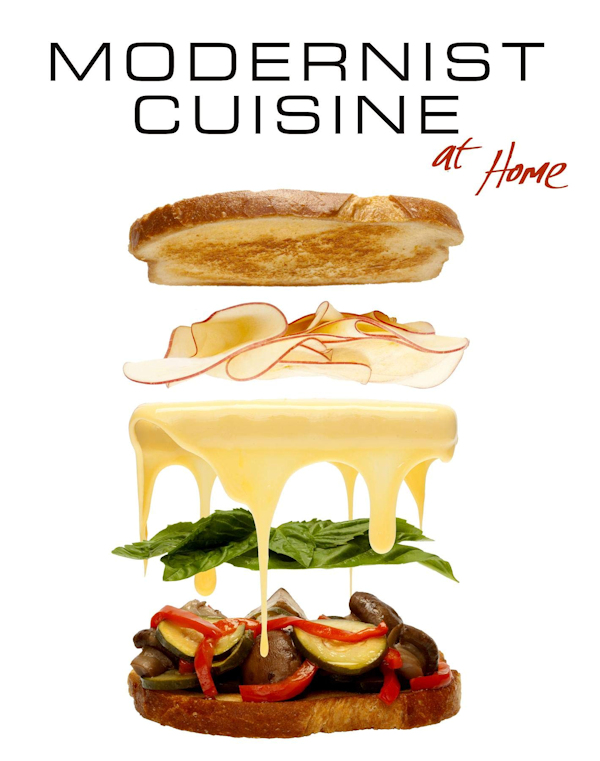
I learned quite a few new cooking techniques over the years since I bought Modernist Cuisine: The Art and Science of Cooking. One area that I had not investigated was the Gel section in book 4 Ingredients and Preparation and this is what I will need to make the carrot and beef layer.
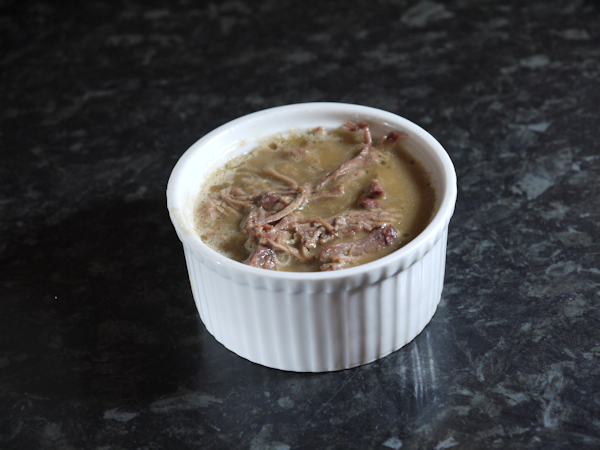
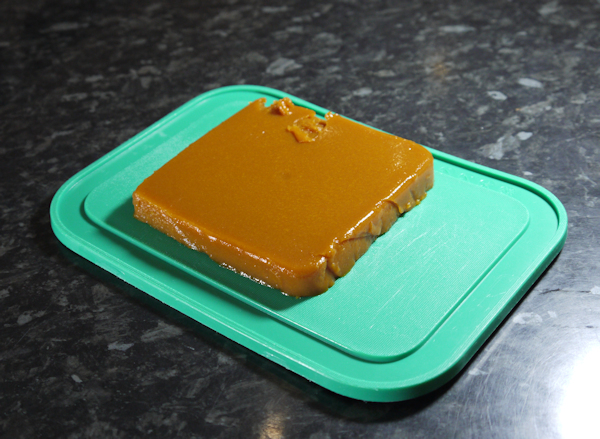
The Beef Layer
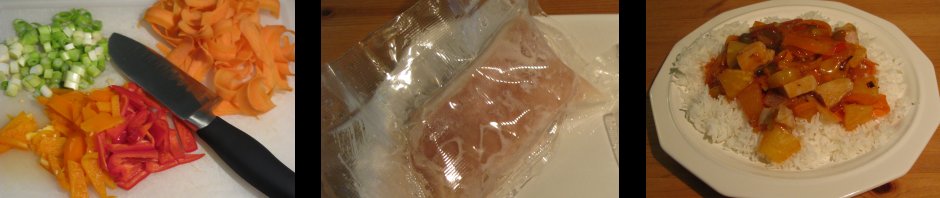
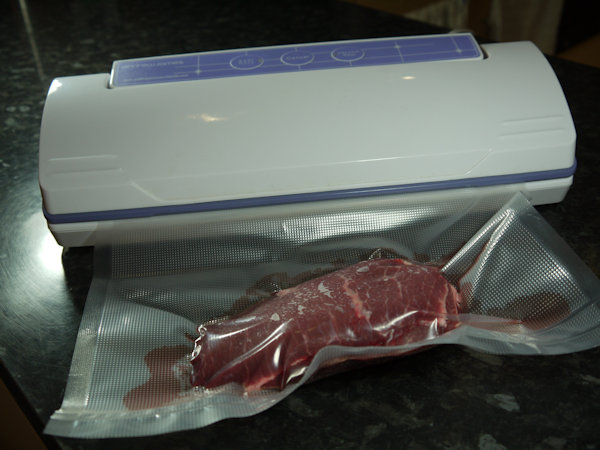
I am not going to eat anything that has been boiled for 2 hours so I needed an alternative. Assuming that the cut of meat should be inexpensive, I decide on Ox Cheek which I can buy at my local supermarket.
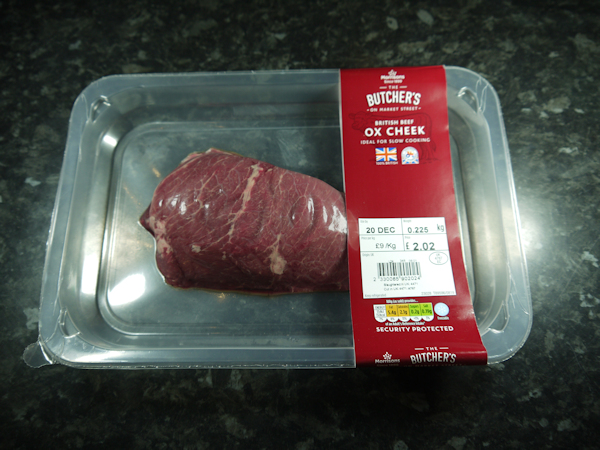
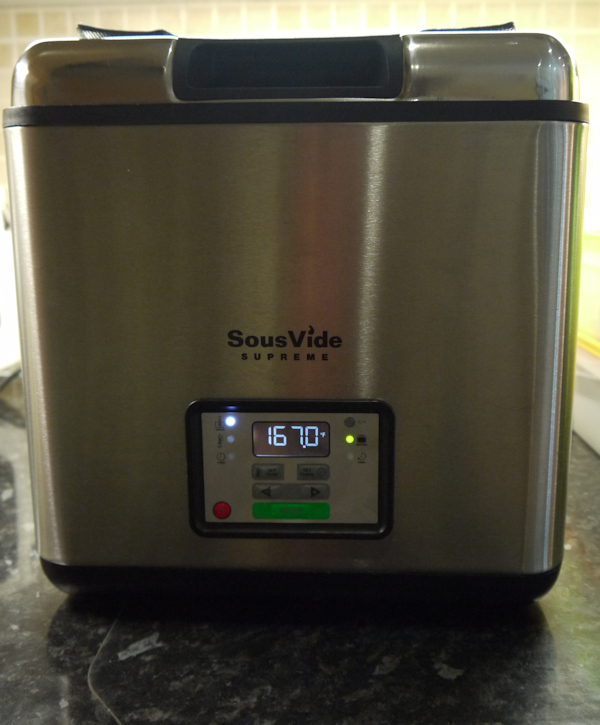
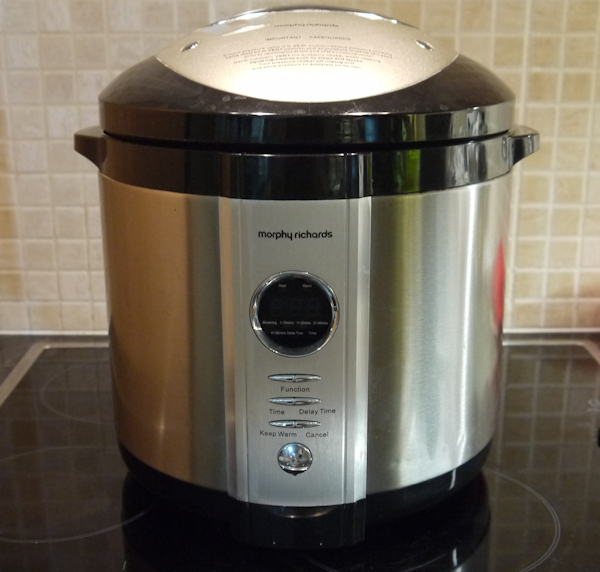
This muscle gets a lot of work so it is going to be quite tough and need some good lovin to make it moist and tender. How about 20 hours in a warm bath to get it started. One of the best ways to prepare inexpensive cuts of meat is to cook them Sous Vide which means “under vacuum” in French. Sous Vide is the process of vacuum-sealing food in a bag, then cooking it to a very precise temperature in a water bath. This technique produces results that are impossible to achieve through any other cooking method. First the meat needs to be sealed in a plastic bag in a vacuum sealer.
The Sous Vide Supreme is basically a big tub full of 9 litres of water with a very sensitive heat controller that holds the temperature at +/- 1 degree of the setting chosen. For Ox Cheek this is 167F – 75C. In normal cooking you apply heat over time to the outside of the meat to try and cook the inside, without burning the outside to a cinder. Sous Vide uses the entropy of a large mass of water at a specific temperature to force the objects contained within the water to achieve the same temperature, but no more, over a period of time and thus reaching equilibrium. For Ox Cheek this is 20 hours. The reason for the vacuum seal is that dead air space is an insulator and disrupts heat flow, think double glazed windows.
After 20 hours in the bath all the tough collagen in the cheek has morphed into lovely liquid gelatine and therefore the meat is moist and has a succulent mouth feel, a far cry from being boiled for 2 hours. I took a couple of forks and pulled it to shreds so we can suspend it in beef gravy.

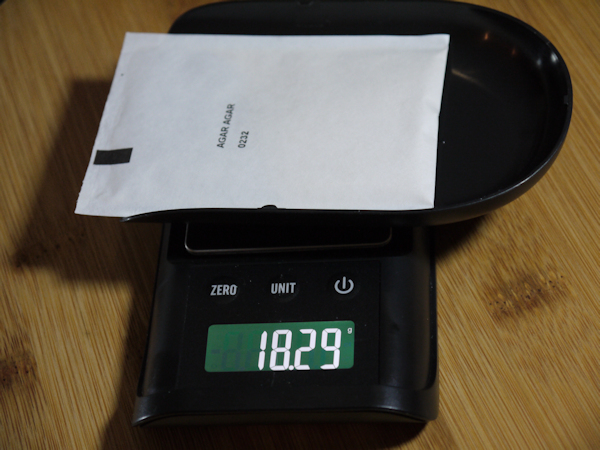
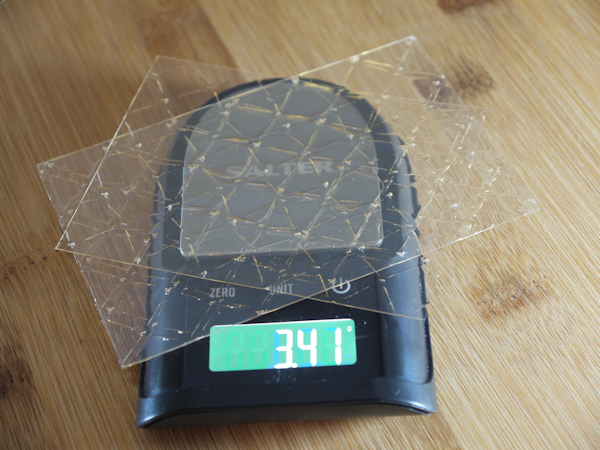
I am not going to use any crazy chemicals in this recipe that you cannot find in your local grocery store so I selected Agar Agar (or just Agar) and gelatine (or gelatin depending on your spell checker). I bought both from my local Waitrose supermarket. Yeah, they are easy to buy but when it comes to using them there are no instructions included so a meat hockey puck is in my future without a little investigation and math.
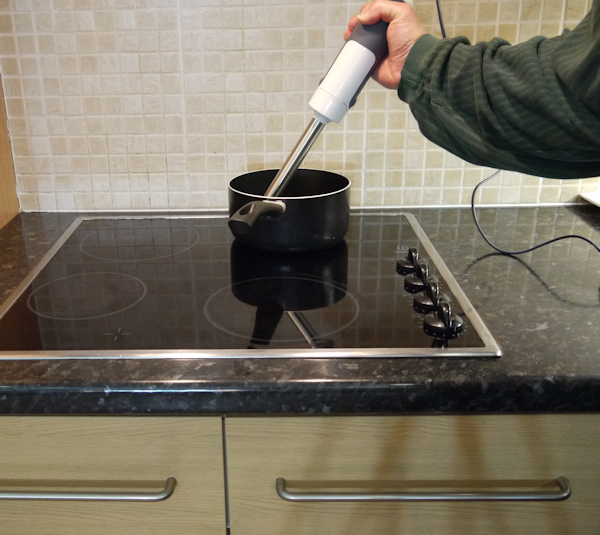
I decided to use Agar with the meat because I can add it to the beef stock and boil it to hydrate the gel and then add the shredded meat at the end in the mould. Investigation in the Modernist Cuisine book said that 0.35% by weight of Agar to liquid would give a firm gel. I weighed the measuring jug then made up 500ml of beef stock and added the juice from the sous vide bag and weighed again and the difference was 292 grams of liquid and therefore needed 1.02 grams of Agar. This is where you are going to need a small accurate scale to measure white powder… wow there are lots of hits on this search on Amazon I wonder why?
To hydrate the Agar gel you need to whisk it while it is at 203F/95C for 3 minutes. This is a little bit tricky because in one hand you have the stick blender and the other hand an instant read thermometer (this picture only shows the blender because I needed one hand to take the picture).
Once the agar and stock have been hydrated, I can add the ox cheek back in and put it into moulds for the fridge.
The Carrot Layer
I had previously made a carrot soup that had a fantastic deep carrot flavour. The base of the soup was just carrots and butter. The recipe for Caramelized Carrot Soup was from a supplemental publication “Modernist Cuisine at Home” that came out a year after the original series of books.
The carrots are peeled from the inside and outside. The outside is peeled to remove the skin and the inside is peeled to remove the core which are rich in calcium and can cause a bitter taste. The carrots and butter are then added to a pressure cooker for 50 minutes which is a long time for carrots because they normally pressure cook for 3 minutes. The extra cooking mean that they come out rich and caramelized.
I am only going to follow the procedure up to step 7 and then add gelatine to create the carrot layer. Gelatine is another interesting gelling agent because it melts in your mouth (body temperature) and therefore does not require boiling to hydrate the gel. I decided to use gelatine (or gelatin) because when the carrots come out of the pressure cooker and are blended in the food processor it would be hot enough melt the gelatine and disperse it evenly.
So how much gelatine do you use? I had Dr. Oetker Platinum Grade Leaf Gelatine and the directions on the back said to use the quantities as stated in your recipe. Well, I had never made this before so back to Modernist Cuisine to find out how much gelatine to use. Modernist Cuisine table for Cold Gels said for very firm use 160 Bloom gelatine at 1.5% by weight. What the heck is a Bloom besides a flower. Turns out the dude that spent his life playing with gelatine was named Bloom so that is the measure of the rigidity of a gelatine. Looking at the packaging for my leaf gelatine there was nothing about Bloom in sight, so a little Googling found the following table:
Bronze: 125-135
Silver: 160
Gold: 190-220
Platinum: 235-265
I assumed that the Platinum version of Dr. Oetker’s gelatine was 250 Bloom and I had about 550g of carrot and butter, so I needed to do some conversion:
550g carrot x 1.5% = 7.5g @ 160 Bloom
160 Bloom / 250 Bloom = 0.64
So I need: 7.5g @ 160 Bloom x 0.64 = 4.8g @ 250 Bloom gelatine leaf.
Back to the accurate scales to measure the gelatine leaf.
The leaf is soaked in cold water for 5 minutes then gently squeezed to remove the water and added to the carrots in the food processor for a quick blitz up. I then poured the carrot and gelatine into a plastic storage box and put it in the refrigerator over night to firm up.
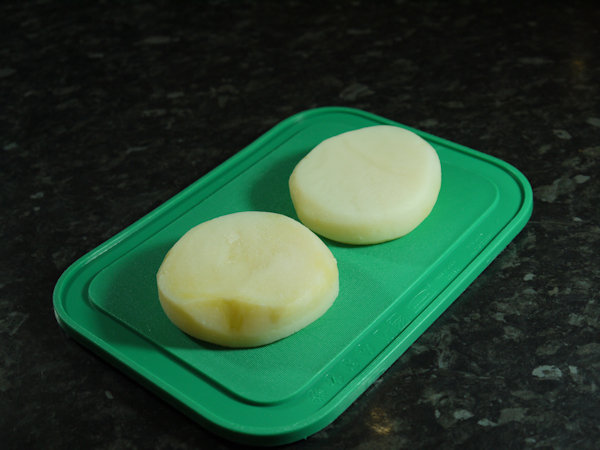
The Potato Layers
These are fairly simple I just cut some rings out of baking potatoes and bagged them up and cooked them Sous Vide at 190F – 87C for an hour.
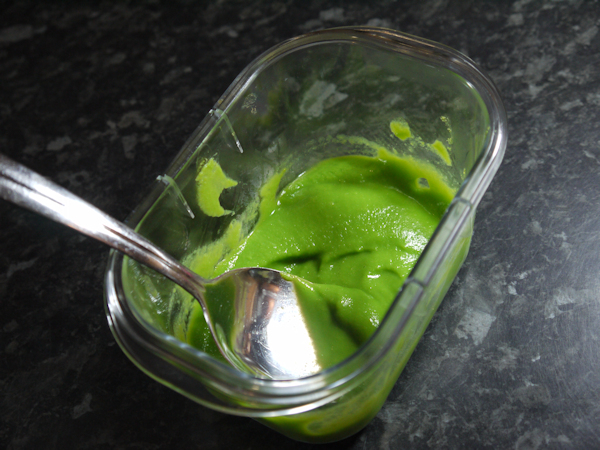
Pea Puree
Again, a simple procedure but adds to the presentation and is an intense shot of pea flavour without the pop of eating cold peas. Bring a large pan of salted water to the boil, blanch 250g of frozen peas for 3 minutes. Strain the peas into a bowl and use a stick blender along with a little water to blitz the peas, adding more liquid in small additions as needed. Blend for no more than 2-3 minutes, until a fairly thick, smooth purée has been achieved. Push the purée through a fine sieve and using the back of a ladle this will give it a silky-smooth finish. I then transferred it to a storage container to cool in the refrigerator.
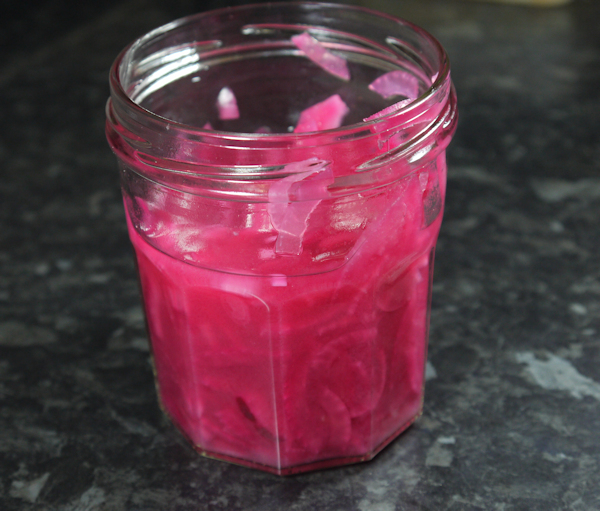
Red Onion Pickles
I lifted this recipe from an accompaniment to Cochinita Pibil because it is great for cutting through rich flavours. Thinly slice a large red onion. Note: red onions can be tough on the outside so remove several layers when peeling. Add onion to a bowl and sprinkle with 1 teaspoon Himalayan pink salt and stir well. Leave for 10 minutes to let the salt extract some of the juice from the onion and then add ½ cup lime juice. Leave at room temperature for 30 minutes stirring every few minutes. Transfer to a jar and put into the fridge for at least 4 hours. The pickles can be stored in the refrigerator for up to a week.
Construction
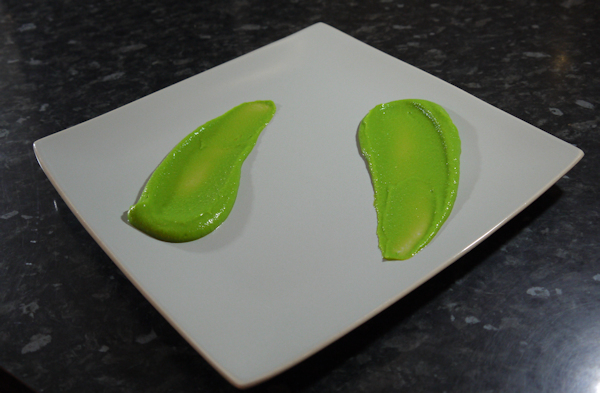
Lay down a pea puree swoosh when there is lots of room (and I can start over if I goof it).
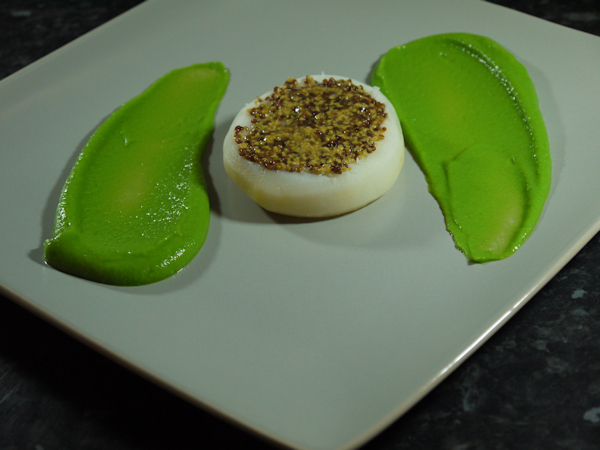
Hollow out a little of the potato and put down a layer of whole grain mustard.
Extract the beef “in gravy” from the mould and place on the potato.
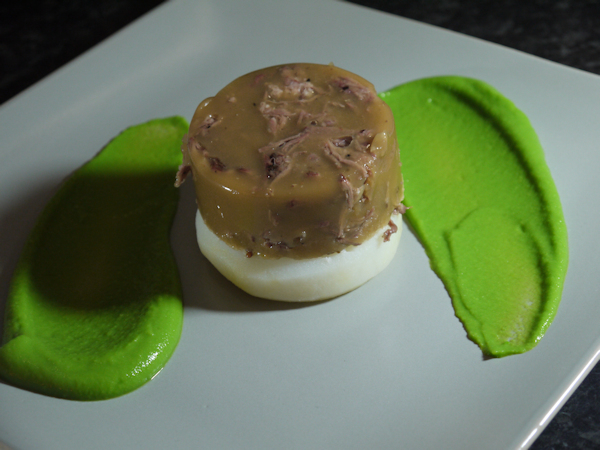
More potato.
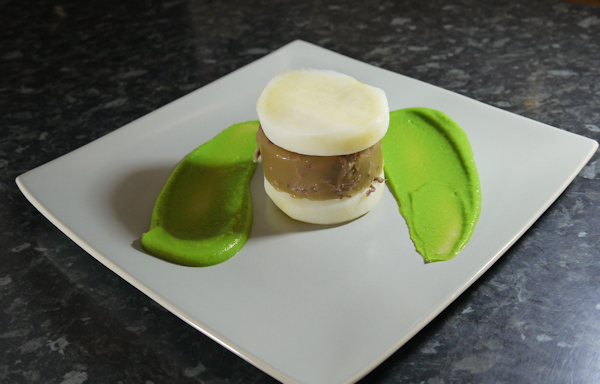
Cut a circle of the carrot and place on top.
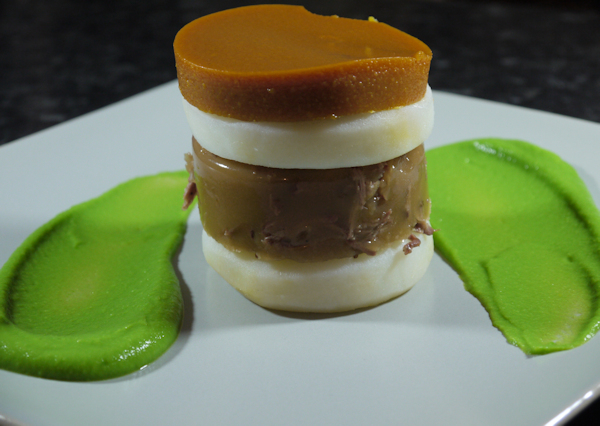
I then used some store-bought mayo and added some French’s yellow mustard and then put it into a piping bag in the fridge for a while. After it was chilled I piped it onto the carrot and added the pickled onions.
Here is the finished construction
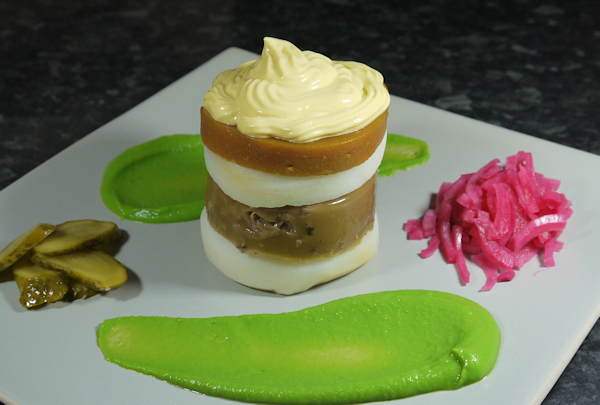
Now that is just about the right amount of mayo…
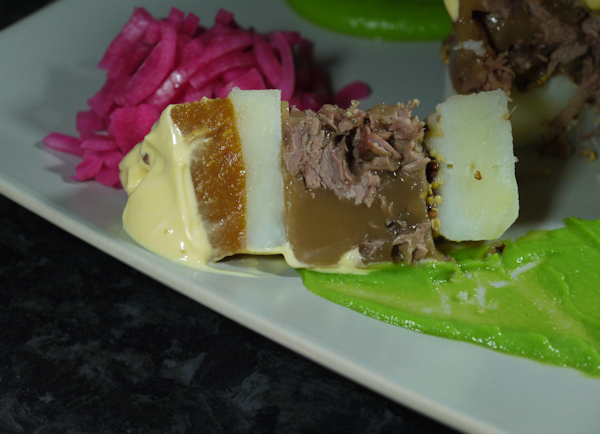
It was really good when you put a bit of each layer onto your fork.
Changes for Next Time
Use less mustard in the mayo.
Make the beef layer ½ as thick (I only had 2 ramekins) add more pepper and chop the meat finer.
Make the potato layers thinner or do something like a potato dauphinoise
One Response to 2020 Food Challenge – starter