Not normally aspirated, we are injected…

With beef stock. This was the first time I used my new food syringe. I had purchased the brisket at Costco earlier in the day because today is prep day and tomorrow is smokin!
Brisket

First get rid of the string, because we want more surface area to inject and apply rub. This is supposed to be kind of messy so I put the opened brisket into a foil pan, which we will use later also. Out with the beef stock. I selected the smaller needle and pulled a cylinder of stock and then inserted the needle into the meat about half way and pushed the plunger as I pulled the needle out.
Injecting beef stock

I had a couple of fountains and went all the way through a couple of times, but hey this is my first go. When it works you can see the meat swell and a little puddle of stock when the needle is removed. The brisket was inserted into a Sous Vide bag and doubled sealed. Night, night brisket enjoy a night in the fridge, see you tomorrow!

This blog is hosted by Brinkster, great service and support so check it out…
Posted in Smoking | Leave a comment

You think it would be easy to buy peasant food…

All I wanted was a couple of sections of a cow’s tail, is that too much to ask?

I am in town so I check the local Waitrose for some oxtail, fresh or frozen I don’t care – nope.
In the local Sainsbury’s for the weekly shop: tuna – yes, ham – yes, vegetables – yes, cow tail – nope.
I know let’s try the butcher at the farm shop on the A4. Fresh and frozen nothing but tags showing where they should be. Asked the butcher, he could have some by Thursday – nope.
Off to another butcher, I could have some if I wanted 2kg on Thursday – nope.
Last chance the Sainsbury’s Superstore – bingo!

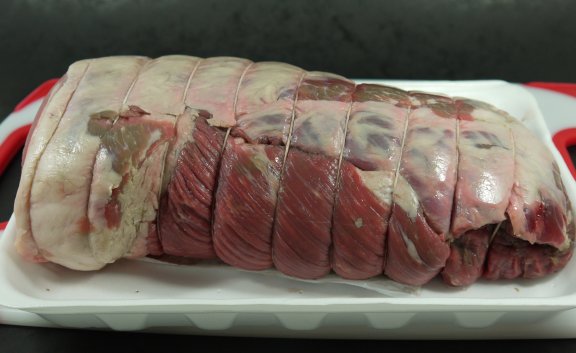
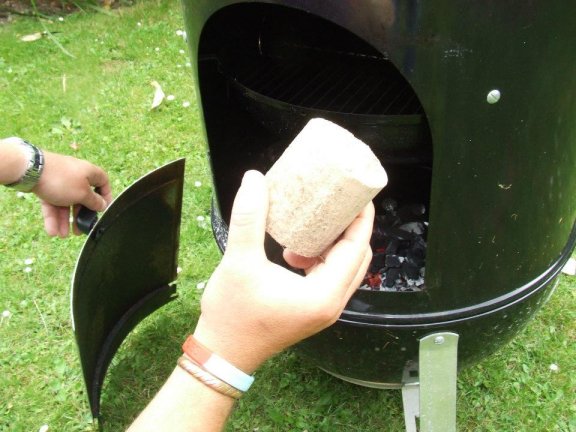
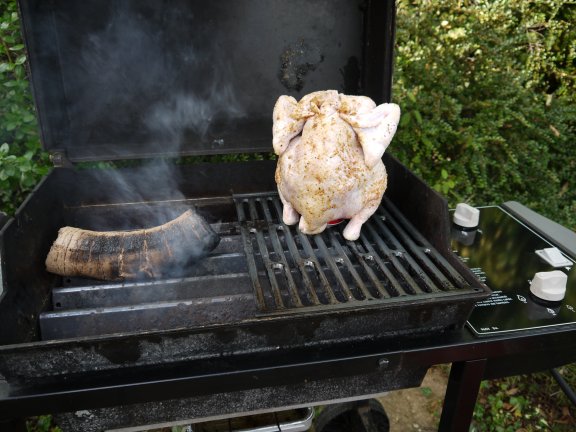
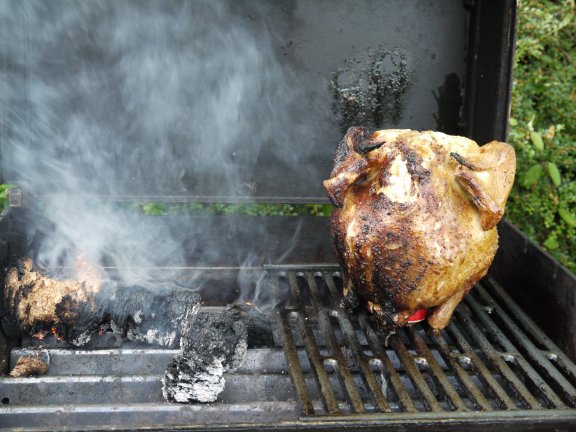
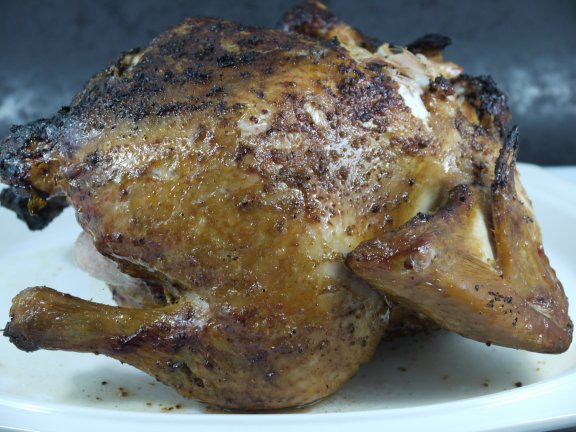
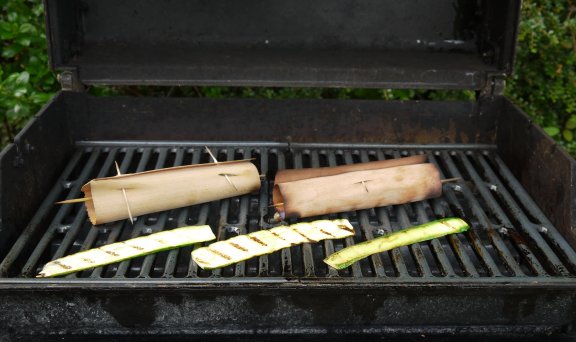
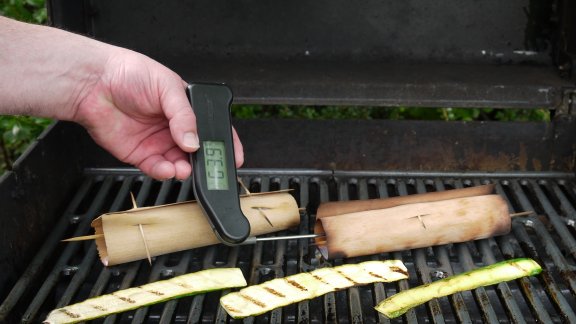
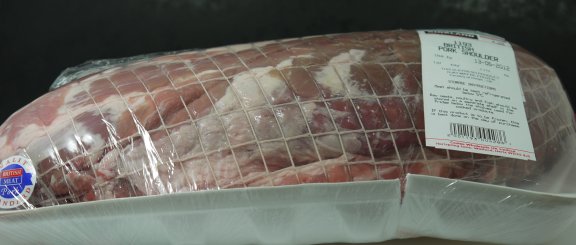
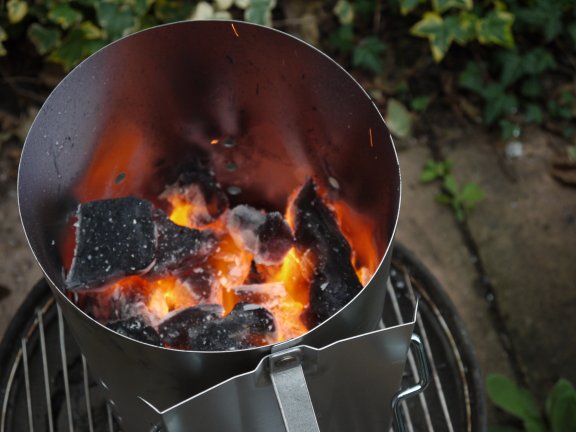
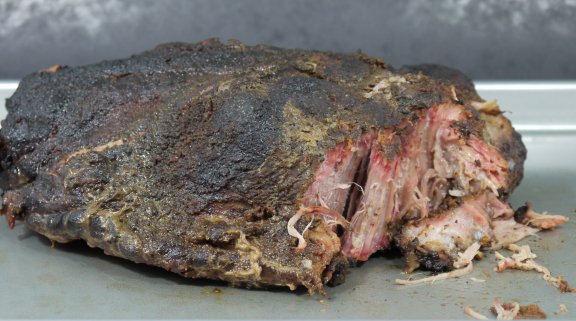
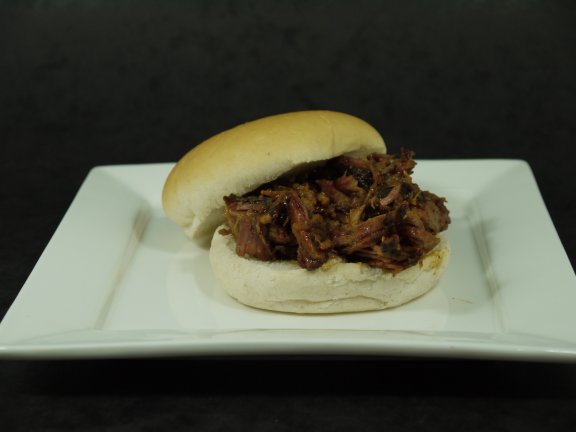
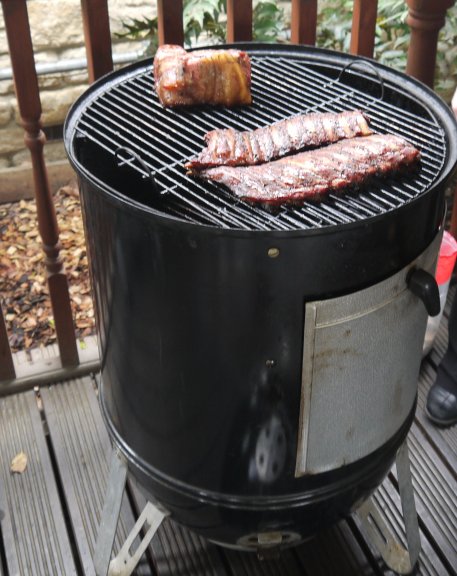
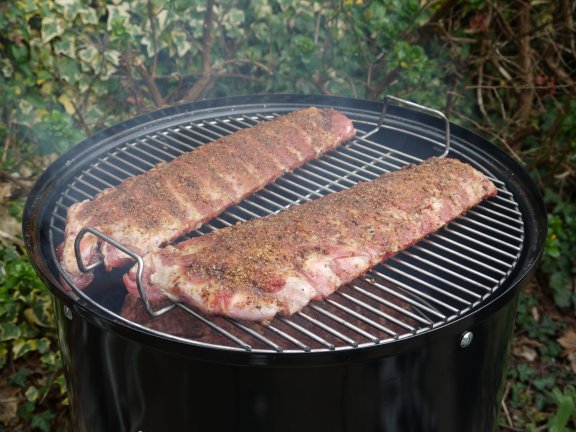
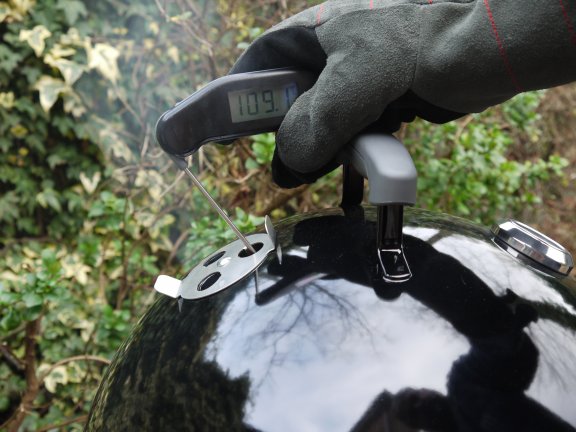
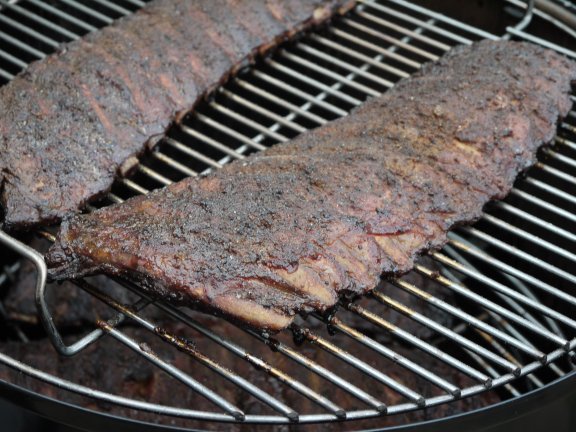
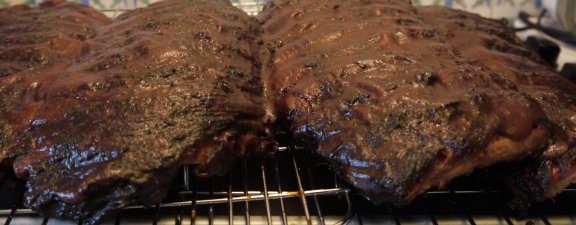
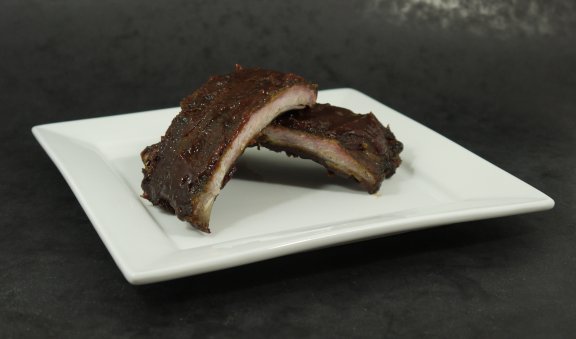
What’s with the oxtail, well it is a long story so sit back and relax and I will try not to bore you. It is all about BRISKET, another cut of peasant food, but it is also the golden ring of pit boss legendry to which I am soon to be famous for!!! Do you remember that back in January I bought a Weber Smokey Mountain Well it appears that the telling of a pit boss is his beef brisket. This is no feat taken lightly and in fact I have been building up to this for some time. I have had test firings of Smoked Turkey, Smoked Ribs, Pork Shoulder and
Smoked Chicken but now it was the premiere league. First we need to have a way to impart flavour and juice like no other within the meat. So I purchased a food syringe, which was rebadged by Heston so had to be good.
Food Syringe

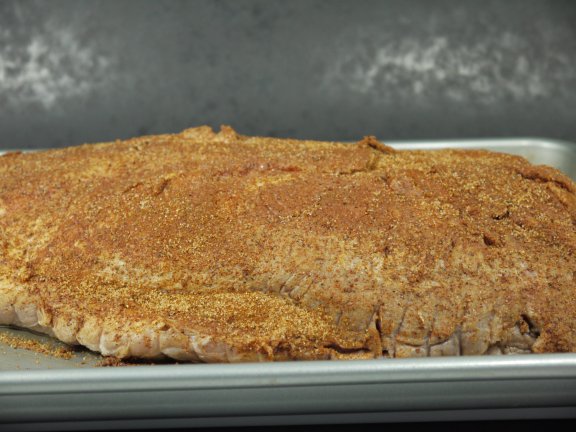
But what to put into the syringe to make my brisket the best in Berkshire (let’s start small, the world will be next). The Modernist Cuisine: The Art and Science of Cooking book 2, Techniques and Equipment

Techniques and Equipment

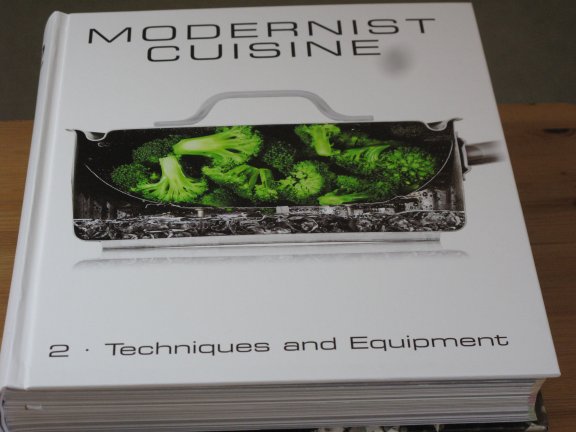
has a section on making stocks. They have done extensive research into stock making and have debunked several of the older concepts of making the best stock. The process has several steps and each one takes quite a bit of time and also money. I can now understand why the Modernist Cuisine dinners cost so much, especially when to make the stock used in the dish costs over £15 by itself, and that does not include the petrol finding the raw ingredients!!!!

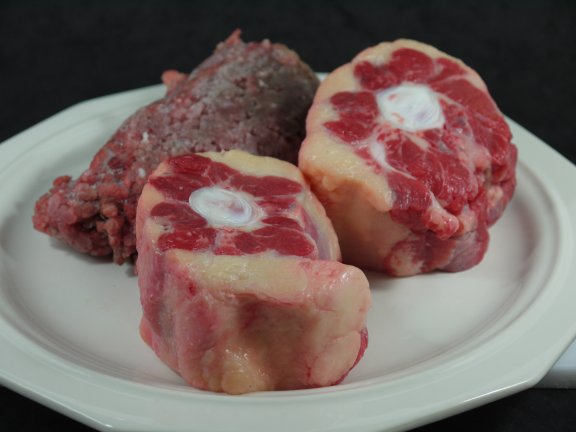
First we need some meat, but we are not going to eat it we are going to throw it away.
Mince Beef and Oxtail

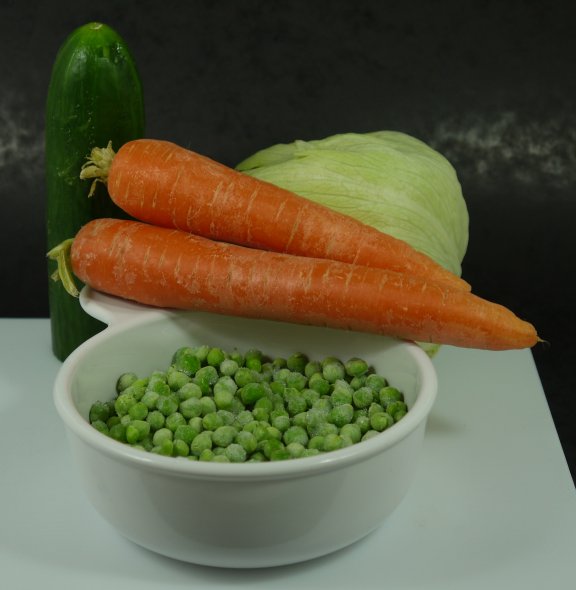
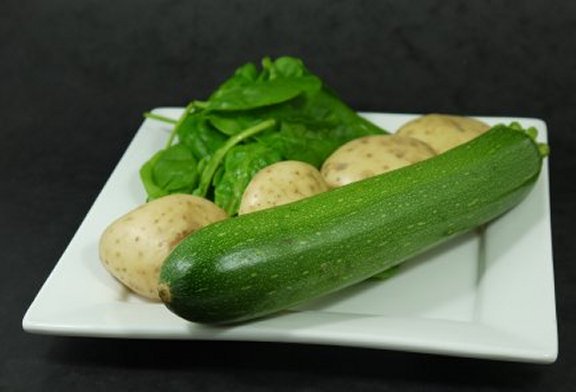
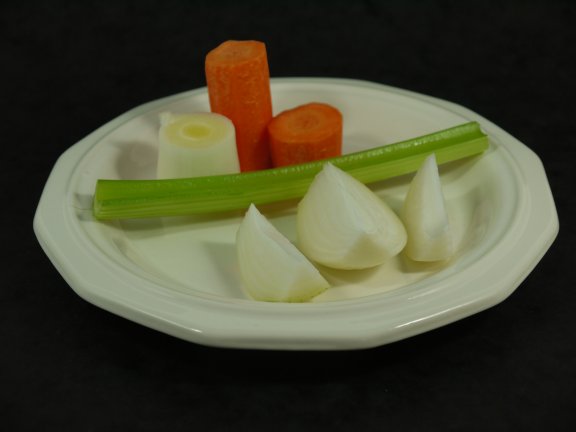
Then we need some vegetables, but we are not going to eat them we are going to throw them away.
Vegetables

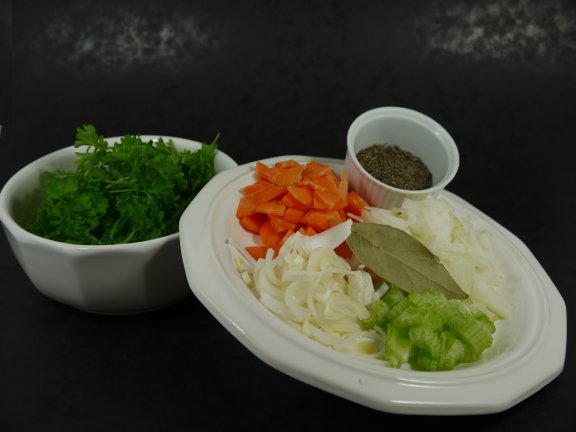
We also need some spices, but we are not going eat them we are going to throw them away with the chopped vegetables.
Veg and Spice

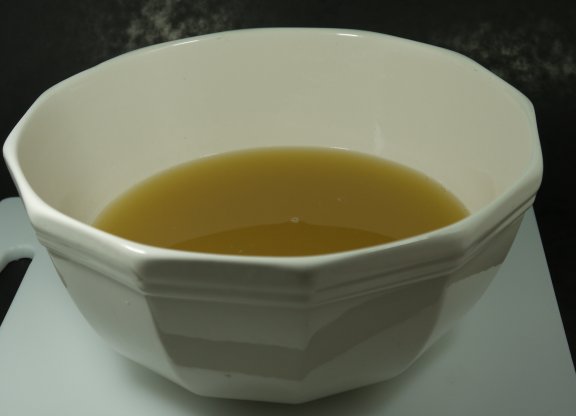
Let’s put this another way, this is NOT stew but instead stock, which is clear and full of flavour and will also fit down the syringe.

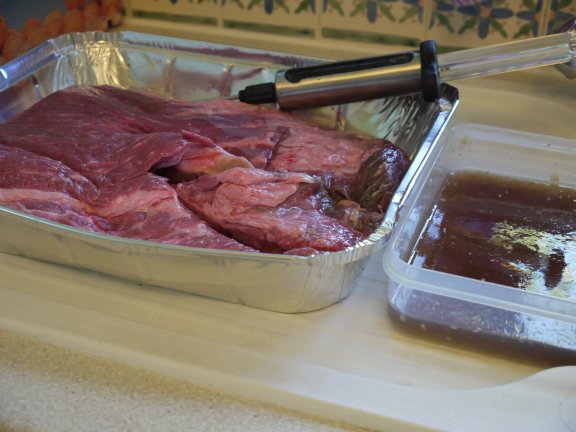
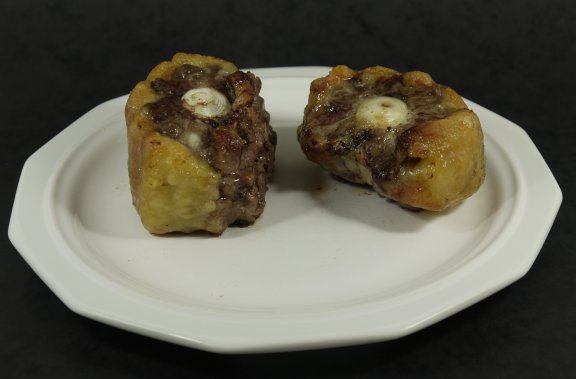
The first step is to extract the flavour from out meat. The MC guys said to cut the oxtail into sections with a band saw. Hmmm I have a nasty looking cleaver will that work, uh no just made a mess so we will use full pieces of oxtail. I understand the reason behind cutting the oxtail into slices, it all has to do with surface area. If you slice the oxtail into 3 sections then you will have 6 surfaces to take on the flavour imparted by browning the meat, also called the Maillard reaction. So into the oven the oxtail go for a bit of browning in some of the beef dripping
Beef Dripping

When it is done we set it aside to add to the pot.
Roasted Oxtail

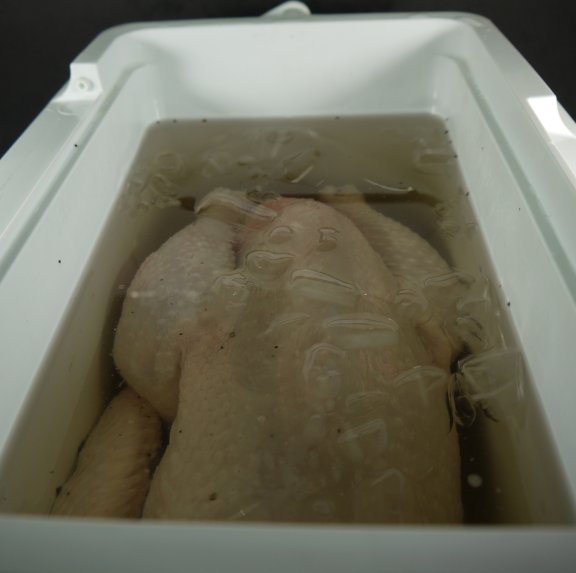
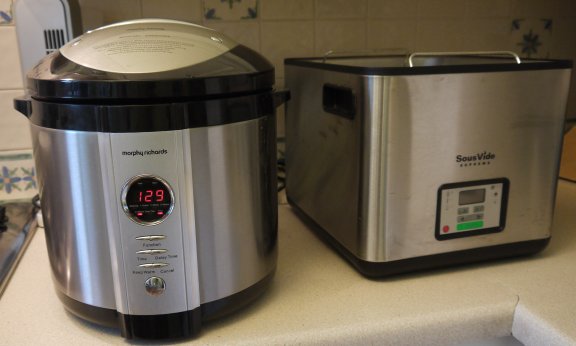
Next we need to SousVide Supreme the mince to extract the meat juice. This is quite a high temperature for Sous Vide and resulted in a rock hard chunk of mince and some really strong flavoured juice. Now that the meat is prepared then the vegetables need to be bulked out. One of the old ways to make stock is to take carcase and large junks of vegetables and boil them for long periods of time over a low heat. The Modernist Cuisine method is to cut the vegetables thin and grind the meat to increase the surface area which can be transformed into stock. Also instead of using a stock pot with an open lid the MC guy’s employee a pressure cooker which works faster and also minimizes the loss of flavour to the surrounding air. Notice the increase of surface area on the vegetables when they are thinly sliced verses the picture when they were whole.
Vegetables

Veg and Spice

We are ready to use the Morphy Richards 48815 Digital Electric Pressure Cooker, so into the pot goes the oxtail, the juice from the to SousVide Supreme mince and all the vegetables and spices.
Pressure Cooker

Add a couple of flavour enhancer’s in the form of red wine and port.
Red Wine and Port

And some water, not from the tap in this area because it is hard and will change the flavour of the stock
Bottled Water

This gets pressure cooked for 2.5 hours which is a very long time in PC time. This would probably equate to about 7.5 hours of simmering on the stove. It is a crazy long time because my pressure cooker maximum is 1.5 hours on the timer, so I had to do two sessions. When this was done, it tasted great, such depth. I put it in the fridge overnight and then removed the fat and put it into the freezer ready for the kick-off of brisket day!!!

This blog is hosted by Brinkster, great service and support so check it out…
Posted in Recipes, Smoking | Leave a comment

Smoking for the Common Man/Woman…

As you probably know I have been into smoking meat lately. There are several techniques that are used in the USA and are now making an appearance here in the UK. They are based around using hard woods as a flavour enhancer and can come in the form of wood papers, wood planks used once, wood planks used many times and wood chunks and chips.

One company that I have been watching (on Facebook) lately is The Roasting Plank Company
The Roasting Plank Company

Last week I saw posting that showed what looked like a compressed log of wood chips which was being used in a Weber Smokey Mountain.
What is that…

I went to their website to try and buy some. But I could not find them, so I emailed them and asked what was up. The next thing I know I am a beta tester of a new product.
Cedar, Beech and Oak

I had used Cedar planks for salmon in the past and also Oak chunks in my Weber Smokey Mountain, but I had never used Beech. One other thing I have never done is beer can chicken where you cook the chicken upright sitting on a beer can partially full of beer. Win/Win and it was a steaming hot day in England. Off to Costco to get a really nice chicken.
Chicken

This chicken needs a bit of work to make sure it is really juicy. So I took my Jaccard to it and put lots of little holes into the breast and thigh. I was kind of following the recipe for beer can chicken in Weber’s Smoke: A Guide to Smoke Cooking for Everyone and Any Grill. I decided to brine the chicken for a couple of hours with 1/8 cup of Sea Salt an 1/16 cup of coarse black pepper. Put it in a cooler with some water and ice before you are going to cook.
Chicken in brine

Once the chicken was suitably brined I needed to get it out of its ice bath and return it to room temperature for 45 minute or so. During that time I put together a simple rub as outlined in Jamie’s book;
1 tsp sea salt
1 tsp chilli powder
1 tsp garlic granules
1 tsp coarse black pepper

I dried the chicken with paper towels and the basted it with groundnut oil and the applied the rub.

I got a can of beer out and poured about 1/3 of it down the drain (what a waste, but it was warm and nobody likes warm lager). I smashed a couple more holes in the lid with a can opener and we were now good to go.

Now I need to setup the BBQ. I decided to put the wood log on the flavour bars, but not over heat. But after a few minutes it was not really getting going, so I put it over the direct flame. In another 5 minutes I had the opposite effect which was that it caught fire, but that was kind of good since I now had smoke. I blew out the fire and move it back to indirect heat.
Ready to cook

I turned the back burner down to low so I was cooking the chicken indirectly and this also gave some heat to the log, so we were smoking!!!
Smokin

But I left the front burner on high – oops after about 45 minutes I noticed that the sound of drip, drip of fat from the chicken had turned to sizzle…. Fire! I turned off the gas and got a glass of water to dampen things down. A little attention and a sprinkle here and there got things back together. With the front burner down to medium and the back burner on low everything was good and we were smoking again. After about an hour I checked the temp and the chicken was done.
Done on the grill

After a BeerCanEctomy the chicken was on a platter and in-da-howze for some resting and then troughing.
Done on the platter

And here it is plated up with some honey mustard coleslaw and some potato salad.
Plated

It was really juicy and moist. The skin was very nice with the rub. Beech is a light smoke flavour but it really worked with chicken.

I am thinking that the left-over chicken will be great on a flour tortilla with Chipotle paste and some salsa, lettuce, guacamole and sour crème tomorrow oooohhhh yyyaaaaa eat it learn!!!!.

This blog is hosted by Brinkster, great service and support so check it out…
Posted in Uncategorized | Leave a comment

Hot summer days does not always mean BBQ…

After having Panzerotti with the kids for dinner last night I thought I should try and get a bit of health in me diet. One of my favourite salads is not one, not two, but yes seven layers of salad. There is something about the combination of flavours that just works.

Bring on the veg:
Vegetables for salad

So we have:
½ a cucumber
2 carrots
Some lettuce
Frozen peas

So how many frozen peas, or for that matter how much of anything to make the salad layers? The bowl I use has a lid and I use that as a measuring device. Enough peas, or anything else, to fill the lid will make a layer for the salad.

The other bits we will need are:
Other ingredients for salad
¼ cup mayonanaise
½ cup Salad Cream
A lid’s worth of Fusilli pasta
125g of Red Leicester Cheese

OK now we have all the ingredients together we need to start cooking. So put two pans of water on to boil and cook the peas and pasta per their cooking instructions. Meanwhile shred the lettuce and put it into the bottom of your serving dish.
Lettuce

Peel the carrots and grate them over the lettuce.
Carrots
Press them down over the lettuce.

Remove the skin from the cucumber and then cut into ¼ inch cubes.
Cucumber

The peas and pasta should be done now so drain and rinse with cold water. Grate the cheese on top of the cucumber and press down.
Cheese

Add the cooked and cooled pasta to the dish.
Pasta

In a bowl combine the salad cream and mayonnaise. Then spread on top of the pasta like you were icing a cake.
Salad Cream and Mayo

Finally sprinkle the cooked peas on the top of the sauce.
Peas

This needs at least an hour in the fridge to get everything the same temperature and working together. Here is a side view.
7 Layer Salad

With some crackers this made me say yum all weekend, and somewhat healthy to boot!

This blog is hosted by Brinkster, great service and support so check it out…
Posted in Sides, Vegetarian | Leave a comment

Sorry it has been…

way too long since I have written a blog. The last one was mid May. My defence is that starting with May it is supposed to be summer and BBQ season right? Well, in England we have been absolutely smashed up with rain. In some strange BBQ protest the Gulf Stream decide to go north for the beginning of the “English Summer”. Doesn’t it know that it is grim up North! It must have eaten a few too many pies and decided to come back down south for a bit of a trim up to look good on the beach, because we are finally getting some summer! What should I BBQ on this wonderful Saturday evening?

I had been accumulating some interesting smoking / BBQ devices that intrigued me. I got the Cedar ones for Christmas from The Roasting Plank Company.
Cedar Wood Papers

And the Cherry ones from my Weber Smoking Course goody bag.
Cherry Wood Papers

So about an hour before you want to cook put the papers and a couple of skewers
Paper and Skewers

into water to soak. It is best to put a weight on them so they do not float.
Soaking Paper and Skewers

When I was at the Weber Smoking Course I thought that the wood papers would be good for scallops. So I defrosted some king scallops without roe and then put them in a bag with some olive oil to marinate.
King Scallops

Scallops by themselves cooked in butter are a great starter (especially if you wrap them in some porky goodness that is bacon) but this was a main meal so I needed some accompaniments. I chose Jersey Royal new potatoes, courgette and a bed of fresh baby spinach.
Vegetables

I was using Jersey Royal new Potatoes because I love their creamy goodness and flavour. As the season progresses the “new” potatoes slowly turn into larger version of their predecessors so you may have to cut them down to the size of your scallops. Then steam them for 15 minutes.

I really like grilled courgette! So I thinly sliced some and put it into a bag with olive oil and lemon juice to marinate.
Courgette marinate

I had recently purchased a French tarragon plant for my herb garden and decided to grab a couple of the sprigs for the meal.
Fresh Tarragon

The dinner was prepped and ready for assembly. Here is the pre-rolled assembly.
Ready to roll

It will be kind of like a scallop and potato kebab, but in its own little smoky oven. Roll them up and close with a toothpick.
Rolled Wood Paper secured

Prep your grill for medium indirect heat. So if you have charcoal that means waiting until the stack is white and then splitting half to each side. For gas it means both burners to medium. Once you are up to temp put the papers in between the heat and set the alarm for 3 minutes. When the alarm fires then put the courgettes over the coals / burners in direct heat and restart the alarm for 3 minutes. When the alarm fires turn the courgettes (they should have grill marks if not leave them) and reset for another 3 minutes.
Food on the grill

This is when you need a Thermapen from ETI to check the internal temperature of the scallops without opening the package. The only thing worse than over cooked food is under cooked food. So if you know that a scallop is cooked when the internal temperature is 60 C then you know when it is done and you don’t have over cook it to make sure.
Is it done yet

Mine is 63.9C, and I have grill marks on the courgettes so lets check out the finished product.
Cooked
I think you could do a really posh dinner plate with this as is. Imagine some special rice spooned into the background and some asparagus laid in the foreground of the paper. You could probably get at least £20 for this in a posh restaurant.

So lets plate it up and eat…
Plated

The scallops were perfectly cooked. Texture was perfect and they cut with a fork (not rubbery). They were moist and melted in the mouth. The only thing that I was missing was the smoke I was looking forward to. My experience so far with wood papers is that you need to select the strong woods like Oak, Hickory or Mesquite because the time with the food is generally less than 20 minutes it needs a good punch of flavour.

Thinking back on this dinner I think the tarragon was kind of a mistake, since my goal was to tell which wood was the best for scallops on the grill. Tarragon is a strong aniseed flavour and therefore permeated the food with a nice flavour but covered the subtle smoke flavour – especially the really mild cherry. I could get a hint of cedar when eating a scallop by itself which was nice, but in the background was always tarragon. What I really like was that the Jersey Royals really absorbed the tarragon and they were great.

Let us hope we have more nice weather for more testing with these new BBQ products.

This blog is hosted by Brinkster, great service and support so check it out…
Posted in Recipes, Sides, Smoking, Uncategorized | Leave a comment

Low and way too slow…

I bought over 2kg of pork shoulder at Costco for less than £5, but that piece of meat is going to need some “good lovin” to make me go yuuuummmmm.
Pork Shoulder

I was using Jamie Purviance’s recipe from Weber’s Smoke: A Guide to Smoke Cooking for Everyone and Any Grill to make the “Quintessential Pulled Pork Sandwiches”. I kind of used it as guide for temperatures and times, but made up my own twists.

On Friday I checked the weather for the weekend and Saturday was nice, but Sunday was better. This “good lovin” to your pork (I am sure there is a joke there somewhere) takes a long time and plenty of planning in advance. Per Jamie this recipe will take 8 to 10 hours to complete, so mine was about 11 hours. I guess it takes 8 hours if you know what you are doing?

I bought the joint at Costco on Saturday and needed to do some prep work on it. I used the Jaccard to make some small holes Jaccard
in the flesh for the brine to infuse. My brine was unsweetened apple juice and two tablespoons each of sea salt and brown sugar.
Apple Juice Brine

Then into a Sous Vide bag for a lovely night in the fridge.
Apple Juice Brine and Pork in bag

I was supposed to get up early the next day to get the fire stoked and smokin!!! Ya so at about 10:00 in the morning I rolled out of bed and thought I have about 11 hours of work before it gets dark, this is going to be tight.

I got the pork shoulder out f the fridge and decanted the brine, rinsed in cold water and set to the side to get to room temperature. Load the starter with lump wood charcoal and dump it into the smoker.
Lump Wood

I made 4 knots of newspaper by taking two sheets of newspaper and rolling them up in a tight tube then tying and overhand knot in them. Two of them go into the Weber charcoal starter and two underneath sitting on top of my Weber Smokey Joe. Light the paper underneath and in no time you have hot coals.

Preparing the coals

While the coals are getting ready, I created the Basic Barbeque Rub (but toned it down a little per my kids critique of my ribs.
¼ cup coarse sea salt
¼ cup packed dark brown sugar
¼ cup paprika
1 tablespoon ground pepper
1 tablespoon garlic powder
1 tablespoon dried onion flakes (I used onion powder)
½ to 1 teaspoon cayenne pepper
½ teaspoon celery seeds

I rubbed the rub (hmmmmm) all over the joint.
Pork Shoulder with rub

Coals were ready and meat was ready so lets….. smoke it baby!!!! That is how you are at the beginning of the day all full of whoo haaaaa lets go, it was 11:00am. It was a good smoke up until about 3:30 when I decided to go some more Mt. Dew from Sainsbury’s (come on I am American). When I got back there was lots of smoke but the temperature had plummeted, so it was smouldering (damn you road works). Quick pile up of coals and a little bellows action and another can of lit briquettes took care of that issue. At about 5:00 I had a look; it had been 6 hours with not even a sneaky peek. The temperature was close but not quite to the required 160F per Jamie’s recipe and I did not think another can of coal was going to get where I needed to be anytime soon.
Pork Shoulder smoked

So I wrapped it foil and tossed it into the oven on gas mark 1. At about 8:00pm I checked the temperature and it had reached 190F and I took it out for the one hour rest.

Finished off in the oven

At about 9:00pm it was time to pull and eat…
Pulled Pork

I pulled some of the corner of the pork with my hands, it just fell apart. Into a saucepan with some Cattleman’s BBQ Sauce and a little stir up. Onto some buns and here it is plated up.
Pulled pork sandwich with BBQ Sauce

Oh ya I am the smokin Daddy this weekend!!!!! It is also 9:30pm and I absolutely smashed up tired, beer and bed me thinks.

This blog is hosted by Brinkster, great service and support so check it out…
Posted in Smoking | Leave a comment

I stink (again)….

I have been trying to get to grips with my WSM, so today I went to the UK Weber Grill Academy, “Weber’s purpose built cooking school – open all year!” for a course on Smoking Methods. Once out of Reading, I had a lovely drive in the Oxford country side, through blue bells and rape seed fields to a house just outside of Oxford. Upon entering the car park I saw the amazing site of the Weber Experience BBQ Roadshow Airstream Caravan.
Weber Experience BBQ Roadshow Airstream Caravan

We were greeted by Clare who orchestrated the day excellently.
Clare
Oh and a lovely freshly smoked bacon sandwich… nice.

Jamie was our chef, who played mainly the indoors role where he explained/showed the prep to us (at their new table…, your welcome Clare)
Jamie and prep

Jamie is also a dab hand at bread making as he made this Focaccia which was cooked on the grill
Focaccia

The Focaccia (still warm) was used to host our smoked cheese and also some mackerel pate (which I really liked)
Smoked Mackerel

It was interesting to cold smoke the cheese, which I have never done but always wanted to. We used two briquettes in a metal ring and then put soaked wood chips on top of them with the cheese on the other side of the BBQ. Then when the lid is on you put the vents of the lid over the cheese to pull the smoke over the cheese. You have to let the cheese mature in the fridge for 3 days before eating, so we tried some that they had done earlier.

After prep’ing the food course we would head out to the covered grill area to cook and smoke the food
Grill Area

Clare would explain everything about the fire prep, cooking and determining when the food was cooked (every BBQ chef’s dilemma do I cremate it or give them food poisoning).

We used just about every method of grilling and smoking on just about every product Weber catalogues:
Charcoal – direct / indirect / 50-50 / Cold smoking
Weber Smokey Mountain
Weber Q
Planking (some did not make it through the day – vbg) and Wood Papers
Gas with their new smoking boxes that fit over the flavour bars – (nice bought one of those in the accessories store)
Accessories Store

We also used lots of different wood chips to smoke with:
Cherry
Apple
Pecan
Hickory
Oak
Mesquite

Each wood has its own smoking time and permeation into the food which then determines the depth of smoky flavour. We spent quite a bit of time with Clare discussing this with us, and also used all of the wood types to their best food partner.

This process would continue for rest of the day, prep then cook until about 1:00 when we got a sit down in the dinning room (aaahhhhh my poor feet, not used to standing all day)
Dinning Room

In the first course we tucked into smoked shallots dipped in smoked sea salt and smoke peanuts. I really need to have diced smoked shallots on one of my burgers soon, so good. Then the foccacia turned up and with it smoked mackerel pate and some sliced smoke cheese. Too bad I was driving because at that time a large glass of crisp house white would have really hit the spot… another diet Coke please 🙁

While we relaxing and eating our aperitifs, Jamie was making our smoked peppers/tomatoes/garlic into a lovely soup by liquidising and straining then reheating and finally adding some mascarpone cheese. This was brought to the table and I had a great time dunking the foccaci into my tea cup of soup (dunking is not “the done thing” in proper British Society but who cares it rocks!!!).

Jamie had been up early to get the Weber Smokey Mountain smoking some ribs and pork shoulder
Weber Smokey Mountain
And I have to admit that this pork shoulder was the best food of the day, thanks Jamie! I am going to do this soon, but with longer days I need to brine on Friday and then cook on Saturday for about 8 hours to get the pulled pork that I am destined to be famous for… or not.

All in all a great day out and learned lots!! The staff at the Weber Grill Academy are top notch, and the venue was first class. Get in there and learn to BBQ properly and not serve burnt bangers; this is the place to learn it! Now all we need is… some BBQ weather!

This blog is hosted by Brinkster, great service and support so check it out…
Posted in Smoking | Leave a comment

I stink…

of glorious hickory wood smoke. I had purchased some new charcoal and bought a book to improve my smoking technique. Yesterday I went to Costco and bought some ribs to smoke today.
Ribs from Costco

I prepared them by taking off the membrane on the back and then rubbing them with brown sugar.
Ribs coated in brown sugar
The juice from the meat combines with the brown sugar to make syrup. Off they go to have a nice nights sleep in the fridge. You can let them sit over night because there is no salt on them which would start curing the meat. You can watch the technique here.

The next day they come out of the fridge and get a coating of basic rub all over.
Ribs coated rubs

Rubs are kind of like magic tricks you can never tell anyone how they are done. Some pit masters have super secret ingredients that they have tried and tested over years and years. Me I got mine out of a book, Barbecue!: Sauces, Rubs and Marinades and it is not even an exciting one:

From the section on American Rubs (I think there might be a joke there somewhere).
Basic Barbeque Rub.
¼ cup coarse sea salt
¼ cup packed dark brown sugar
¼ cup paprika
3 tablespoons ground pepper
1 tablespoon garlic powder
1 tablespoon dried onion flakes (I used onion powder)
½ to 1 teaspoon cayenne pepper
½ teaspoon celery seeds

It is going to take about 6-7 hours for the whole process. One hour to setup and get the smoker up to heat ready for the ribs. Five to six hours of smoking time and then an hour with the BBQ sauce on the meat to finish. To get a long burn out of the smoker I have followed my new mentor’s book, Weber’s Smoke: A Guide to Smoke Cooking for Everyone and Any Grill written by Jamie (the Weber Daddy) Purviance.

Weber's Smoke

Lay down a chimney starter worth of lump wood charcoal.

Charcoal stoke

Then load another ½ chimney with lump wood charcoal and light it up.

Lit charcoal stoke

And when it is white on the edges distribute it around the unlit charcoal. Now you need to boil some water for the water pan. When the smoker gets to heat then add two lumps of hickory to the charcoal and go get the ribs.

Ribs in the smoker

For the next six hours – worry and fret that all this work will not be in vain. The thing with smoking is that you are never supposed to take the lid off and have a sneaky peak, because you let all the heat and smoke out. They have been in the smoker for almost five hours and I have been out there every hour making sure we have enough heat and water, but I cannot see the ribs grrrrrrr! Be right back; have to make sure we are up to heat….

Taking the smokers temperature

Finally they are done, well smoking anyway. They look burnt, but in pit masters terms that is a really good bark. When the smoke mixes with the brown sugar syrup and spicy rub they produce a kind of spicy candy like coating, but the meat inside is moist and delicious.

Smoke bark on ribs

I then brought them inside and sauced them on the bone side with my favourite BBQ sauce, Cattlemen’s Kansas City Classic BBQ Sauce. then into a oven at gas mark 5 for 20 minutes. BTW Costco has this in stock, but hurry cause I am going to buy it ALL! Then the same treatment for the top side and here they are finally done.

Sauced ribs

The smoke flavour was immense and the combination of the sauce and the bark made them really sticky. The rub gave them a nice little after burner in the back of your mouth. All in all a result.

Just Ribs

This blog is hosted by Brinkster, great service and support so check it out…
Posted in Smoking | Leave a comment

Low and Slow…

The trees are flowering, daffodils are out and aubrietia is emerging from the nooks and crannies so it is time to get it together for some cooking low and slow with SMOKE!!!!

My previous adventure into smoking was good at best. After a little time on The British BBQ Society forums I had a plan to make it GREAT!!!

First thing that needed improvement was the fuel. I was always a briquette fan before I went to the dark side and started using gas. I guess that I did not know any better and being a bit OCD, I liked the uniformity of it all. Nothing like a nice pyramid of briquette’s turning white hot with a couple of beers on a sunny afternoon to make you hungry. But now it is time to bring on the lump dude. This is not your ordinary lumpwood with little bits and dust this is graded to be ready for prime time smoking.

Big K

If your smoker has to last over 4 hours on a single stoking you need some big chunks of coal.

Next thing that needed improvement was my technique. I have signed up for a course at the Weber Grill Academy but that is not until May. We have prime smokin weather here in the UK now and I need to get out of my chair and do some smokin (especially with my new teeth :-). So I purchased Weber’s Smoke: A Guide to Smoke Cooking for Everyone and Any Grill written by Jamie (the Weber Daddy) Purviance.

Weber's Smoke

Both lump and book have arrived today, now all I have to do now is figure out what animals back side I am going to smoke this weekend booooo yaaaaaa!

This blog is hosted by Brinkster, great service and support so check it out…
Posted in Smoking | Leave a comment

Smoke and BBQ a marriage made in heaven…

As I always say, “sometimes left overs are better than the original meal”! I had smoked a turkey breast on the weekend. This was going to be the third consecutive meal of smoked turkey; smoked turkey hot, smoked turkey sandwich, smoked turkey with hmmmmmmm.

Here is what I had to work with.
Ingredients

Oh yah we are talking open faced smoked turkey breast in BBQ sauce covered with shallots for that certain “Je ne sais qua” or some kick butt fire if you are from Iowa.

Cut the turkey in to squares and dice the shallots. Put BBQ sauce with turkey and heat over medium until just about boiling. Pour over buns and then sprinkle with shallots.
Open Faced BBQ Smoked Turkey Sanis

This made me go yuuuummmmm tonight, and I still have a sting in my cheeks, Je ne sais heat!!

This blog is hosted by Brinkster, great service and support so check it out…
Posted in Smoking | Leave a comment